BVC stands for Black Vitrified Ceramic.
From Andre Tallon, the inventory of BVC glass:
The BVC glass is laminated. The term "ceramic" is known, in the public, as the pottery material. The pottery is a mixture of clay with high contain of silicone oxide (SiO2). When heat treated, the SiO2 fuse and link all the clay and other ingredients together.
But the term "ceramic", in technical field describe the crystalline condition of a material. The glass is an amorphous condition, no special molecular arrangement, the ceramic condition of SiO2 is quartz.
If I used that concept is that the amorphous condition have a positive thermal expansion (CTE). The ceramic condition of SiO2 (quartz) have a negative CTE. By using additive and a proper thermal process, create nano cristal in the substrate thus reducing the final CTE.
It is the same concept then Zerodur, ULE, Sitall and Cervit. They have push the concept to almost zero expansion.
In my case, the surface of the layers have a tendency to ceramize faster then in the center, so I can't get low expansion as Zerodur.
The plus side, glass like Zerodur have tendency to have different surface hardness that make figuring difficult. Also those type of glass are very hard and that quite a lot of abrasives and time to make a piece of optic. I did prefer to have a soft glass that have the same hardness all over.
1st mirror blank data:
20 inch diameter BVC made from 1/8" layers, 30 lbs (notable layered mirrors include Chris Fuld's 40"F4.2 http://chrisfuld.blogspot.com/2008/11/my-big-telescope.html) sagitta = 0.48 inches (varies because the edge is not flat), FL = 52.1 inches, FR = 2.6
Ground the backside with full sized tool, 60-90 grit, working preferentially the edge (saddle edges ~ 1/2" remain untouched); 2 lbs of glass ground away with thickness shrunk by 1/16 inch - consistent with starting at 30 lbs and 1 inch thick.
Backside broke through the outer layer. Due to the saddle shape of the glass, there is no curve that I can grind on the mirror's face that won't break through on a bubble on the high ridge.
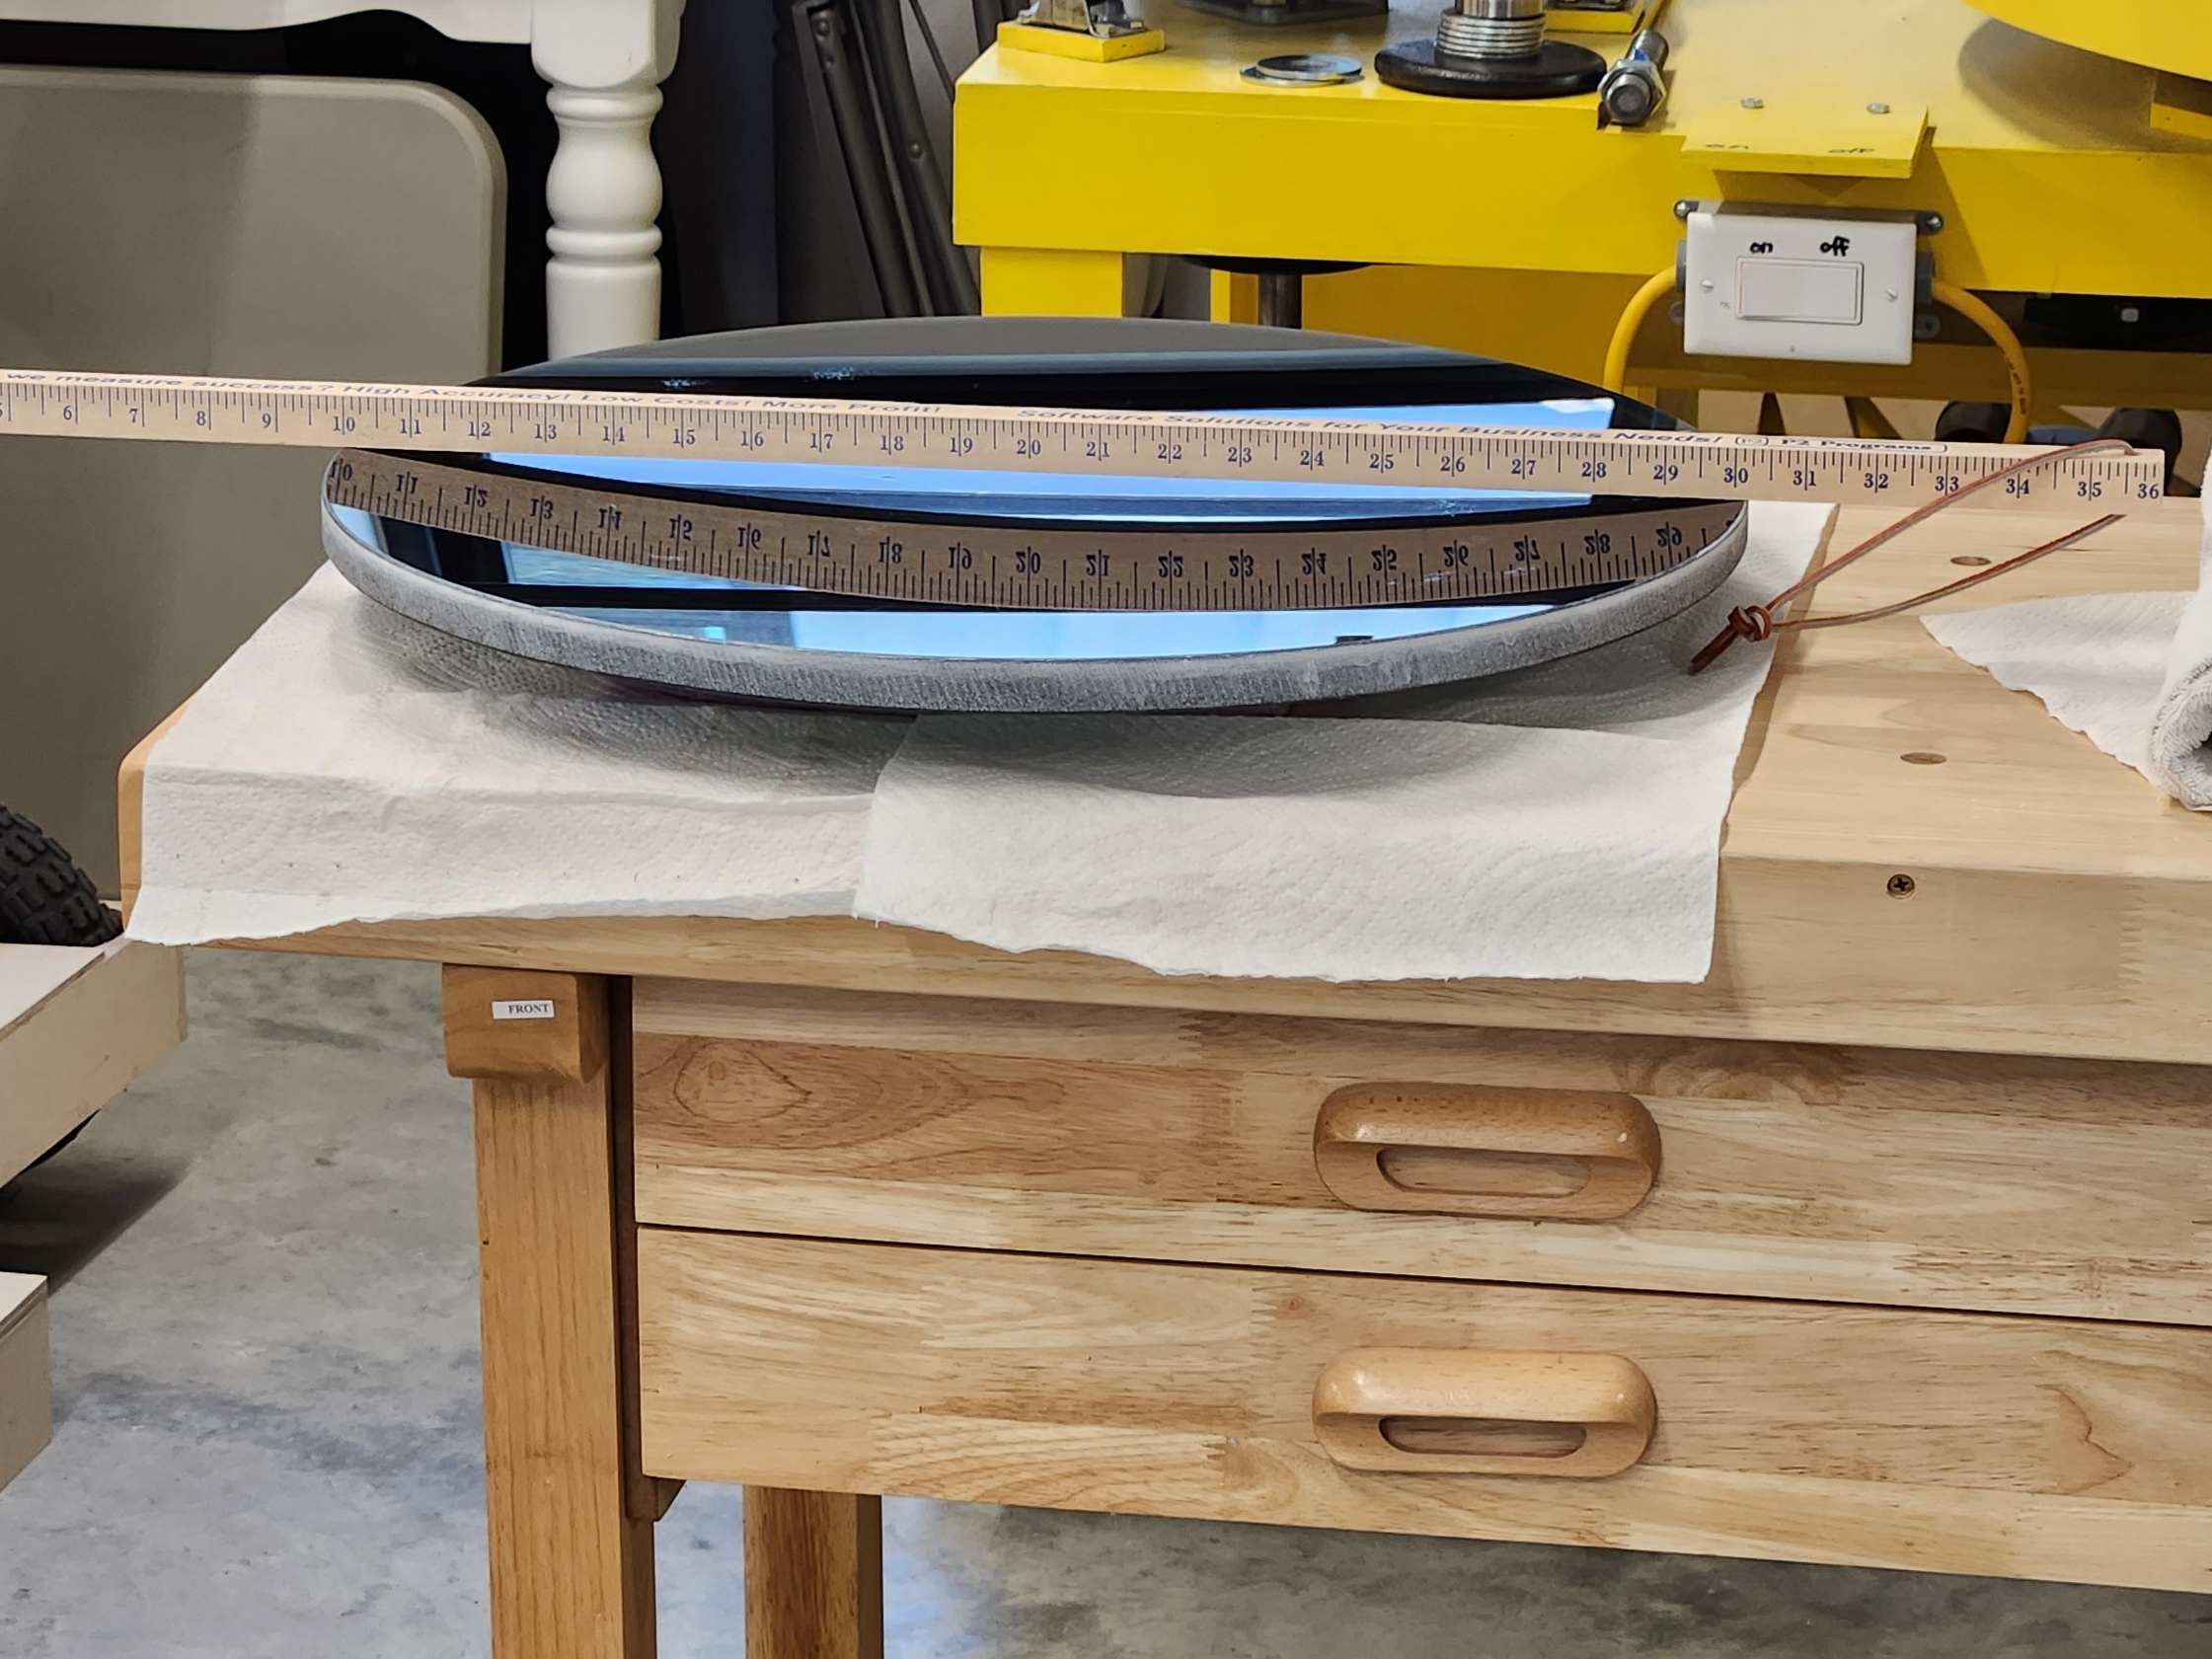
Received new blank, 20 1/4" dia, 7/8" thick down to 3/4" after fine grinding, 25 lbs down to 22.5 lbs after fine grinding. 116.25" RoC, 58.125" FL, F2.89 across 21.1" clear diameter (makes sagitta 0.435 inches).
Thinner blank and bubbles between layers fewer than previous blank; no lack of saddle though.
From first mirror: frontside tool is 1/2" thick at edge, weighs 17 lbs; backside tool also weights 17 lbs.
Grit sequence:
Finished with fine grinding (stop while I am ahead). Finer AlO will likely cause scratching. The consequence is that polishing will take a bit longer compared to finer grits.
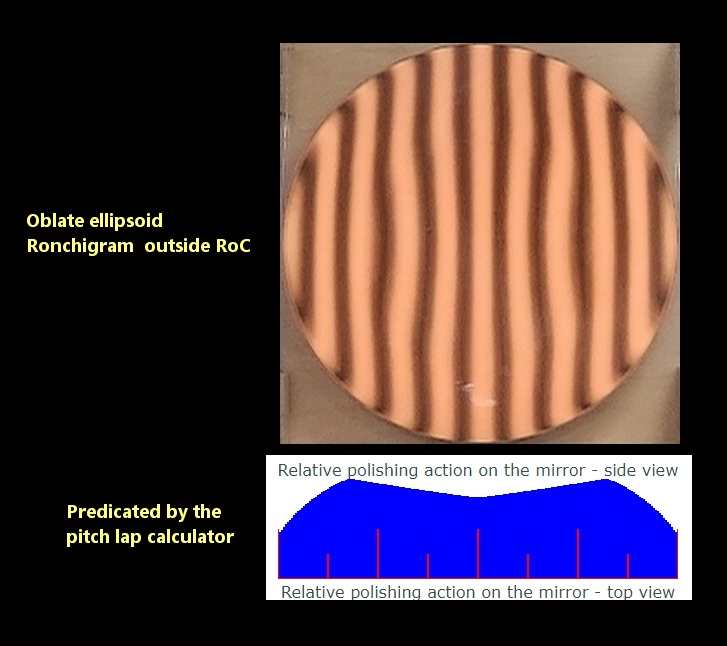
After 1 hr the mirror is reflective all over. Passes test. Oblate ellipsoid.
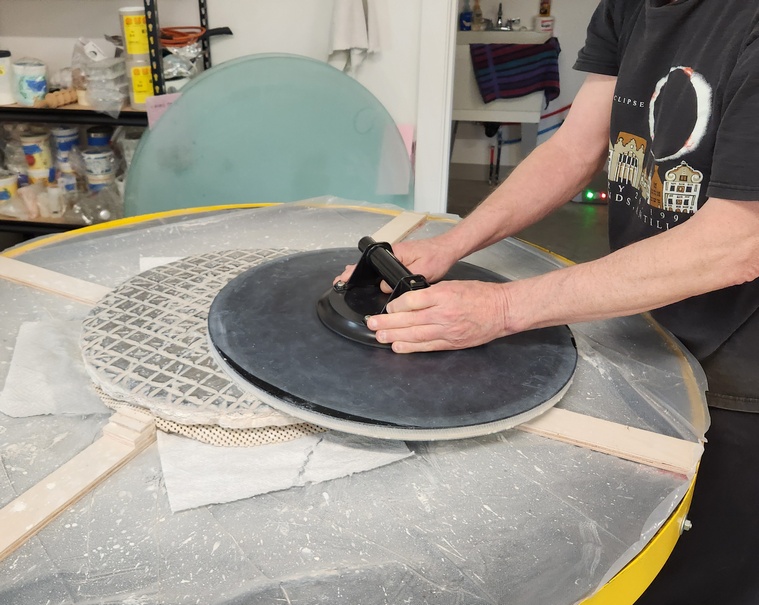
MoT, on machine. Pads come off from time to time. Found scratches from fine grinding which will polish out.
Links to videos (each a few seconds long) of the polishing machine in action:
video 1
video 2
weight of grinding machine arms and pusher pressing down on mirror: 3 1/2 lbs arms + 2 12 lbs pusher + 1/2 lb drive threaded rod = 10 lbs
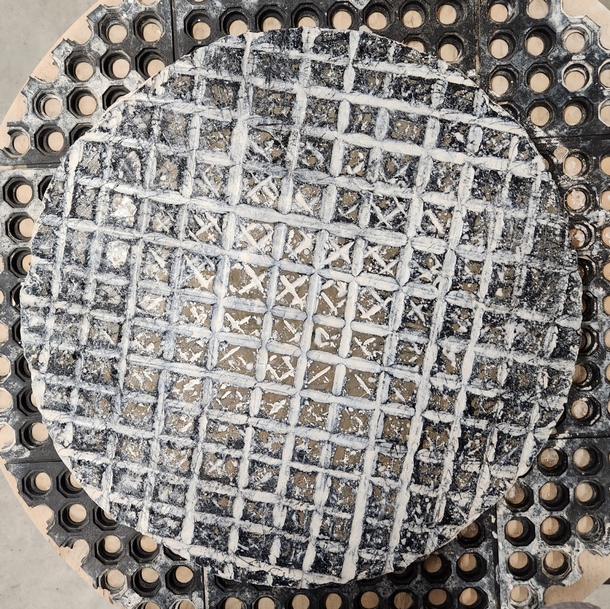
Pitch lap took 1.5 hrs to make. Lap 3/8" thick, took 2 cans of 55 Gugolz (2 kg total; the lap's weight increased by 4 pounds). Channeled into 1.5" squares. Cannot contact through mirror back - need more powerful worklight? About 2/3 contact using wooden template to guide pitch pouring.
24 hrs 1/4-1/3 stroke, MoT, on machine.
comparisons
~4 wks from start to finish of polishing (about the same as the 16F2.9, 2 months for the 20F4.8)
No TDE; mirror appears regular.
6 pt ok for the 16x3/8F2.9 but not good enough for the 20, 9 pt not better than the 6 pt, so make an 18 pt support, 5x better than the 6 pt. Here are some deformation values:
~1 week to get the parts and assemble a test stand with the 18 pt support.
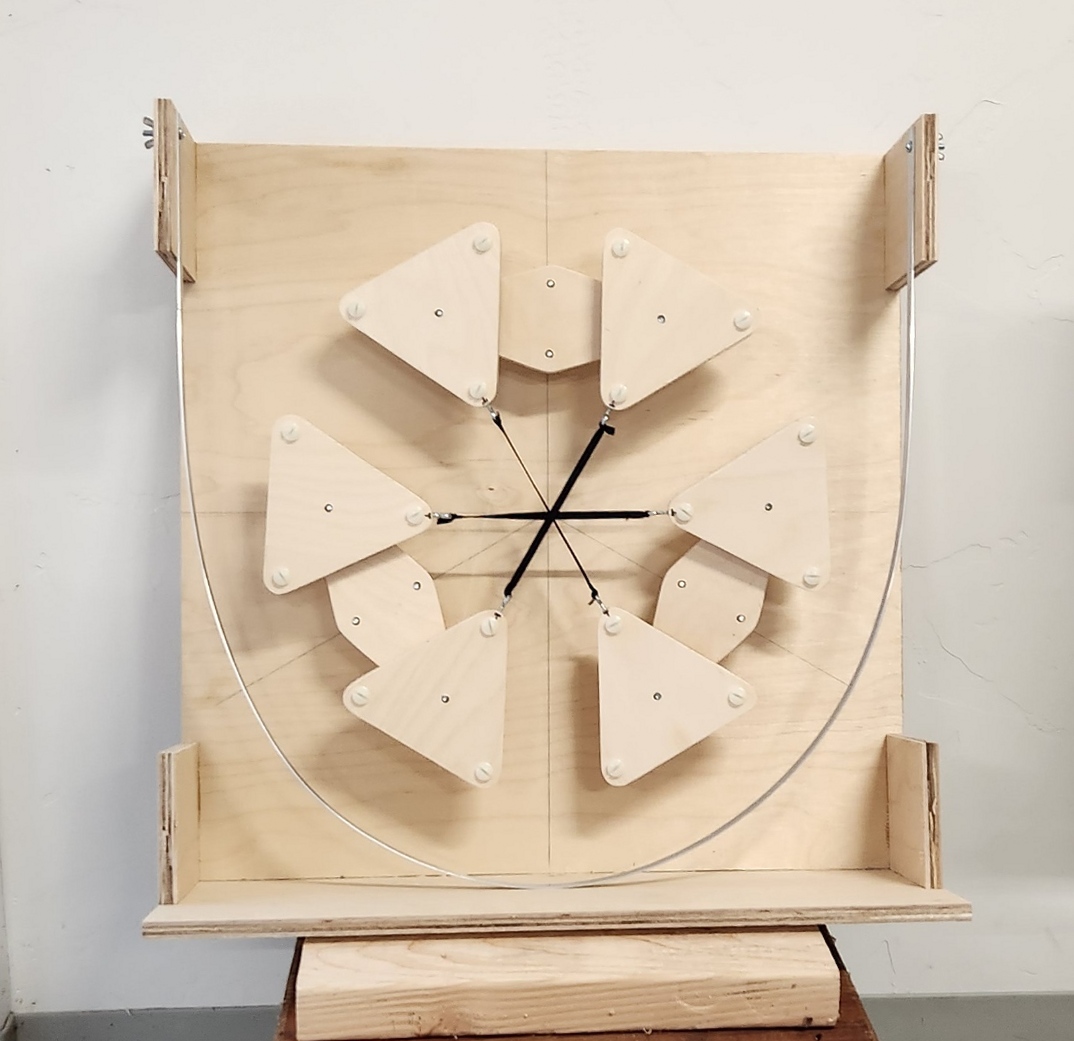
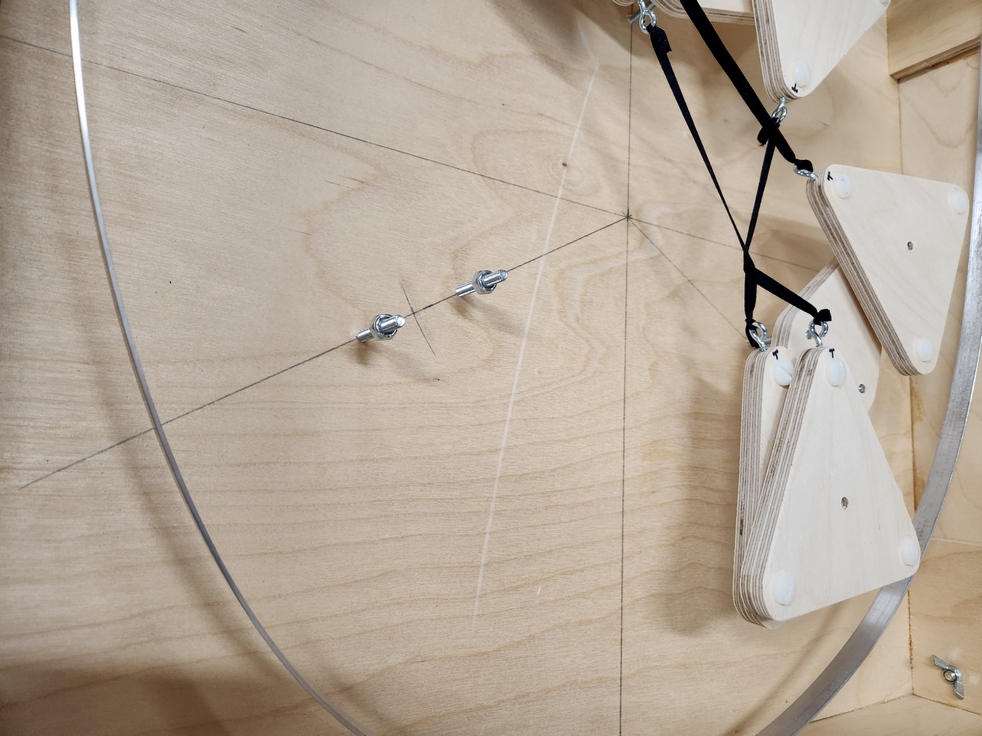
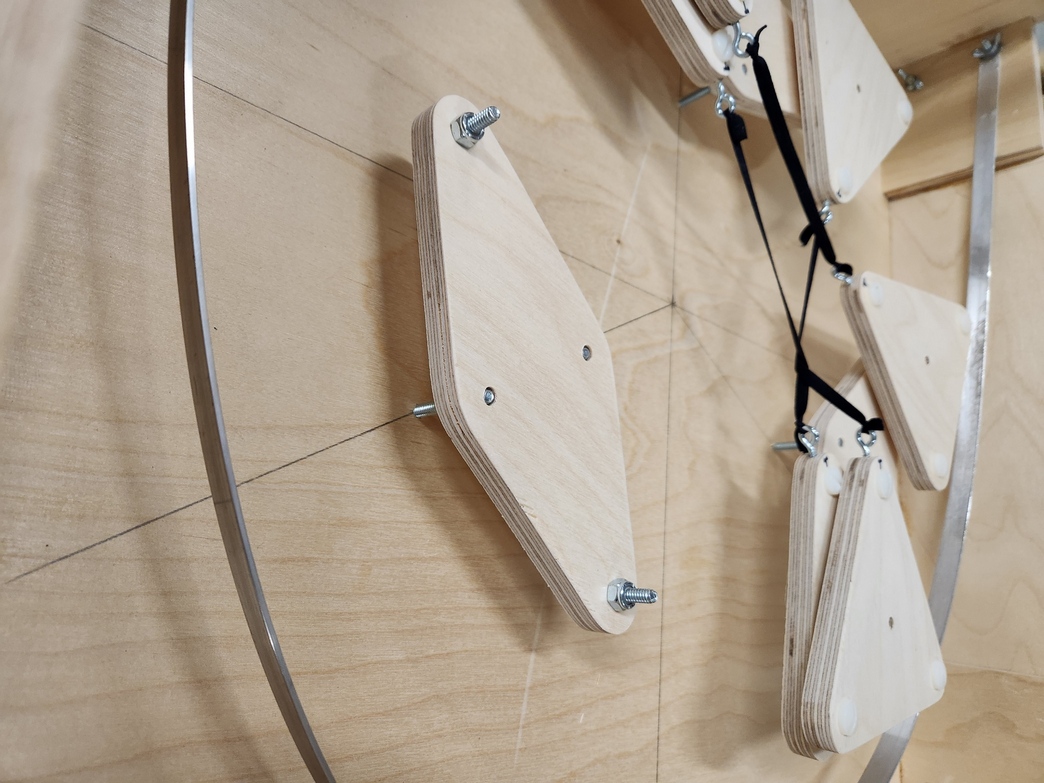
I use 10-24 machine bolts very tightly threaded through a single piece of 1/2 inch thick plywood. I do not tap the threads because then the bolts will move too easily. They have to move very stiffly. The idea is that once the mirror is aimed at the focuser center axis, they will never be adjusted again for the life of the telescope.
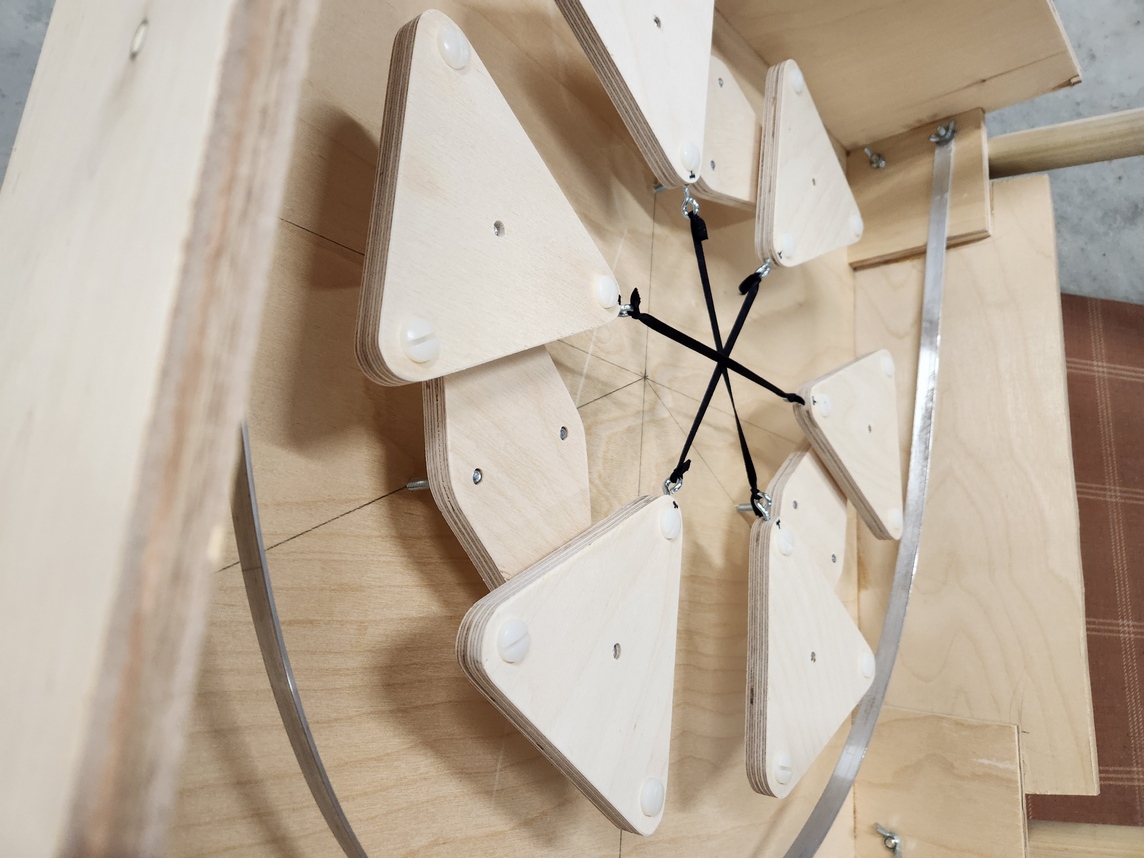
I then thread on lock nuts that keep the 3 bars made from 1/2 inch Baltic Birch in place. The hardware is all 10-24.
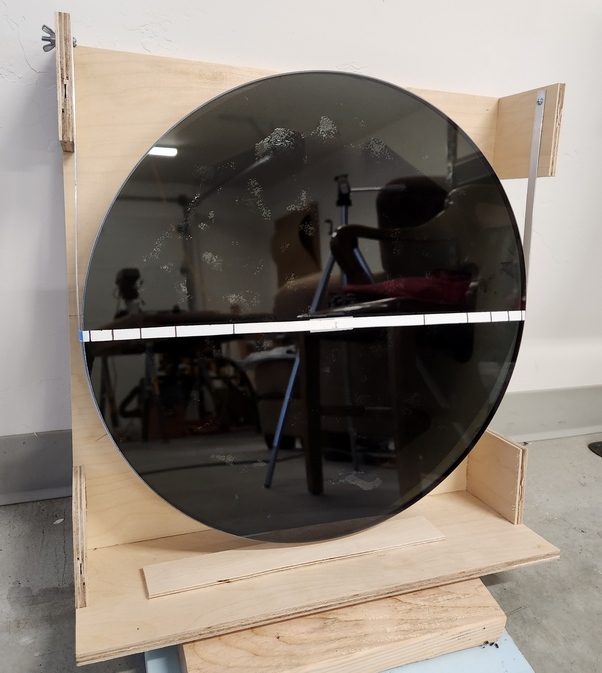
Since the mirror is black and opaque, I center the focuser axis on the intersection of the lines and the elastic strips using a laser collimator. I make sure when I build the cell and sling that the mirror sits exactly in the middle. I do not center dot or whatever the mirror. Final step is collimating the mirror so that its axis falls on the focuser axis.
The sling is a 1/16 X 1/2 inch [1.5x13mm] aluminum strip held at the top of the mirror cell. In the mirror cell for the telescope, the sling will be adjustable so that it can sit exactly at the mirror's center of gravity. To calculate the mirror's CG, go here.
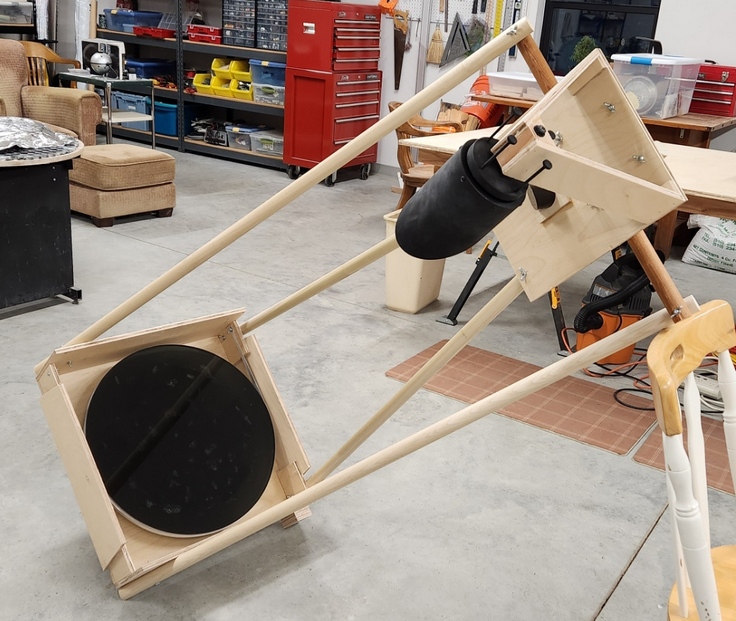
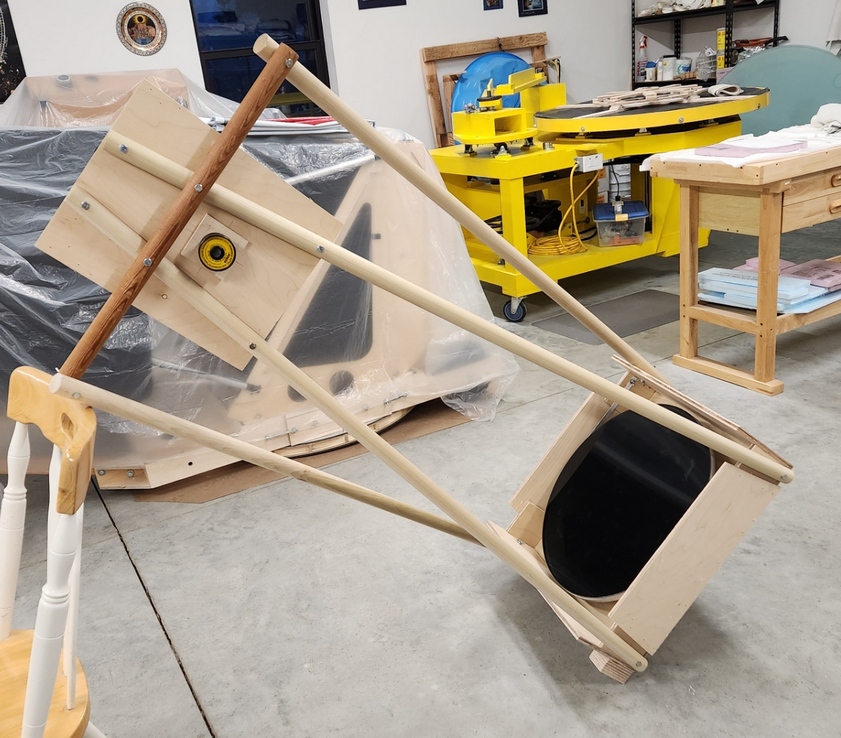
I chose an 'A' frame design that I've used in the past.
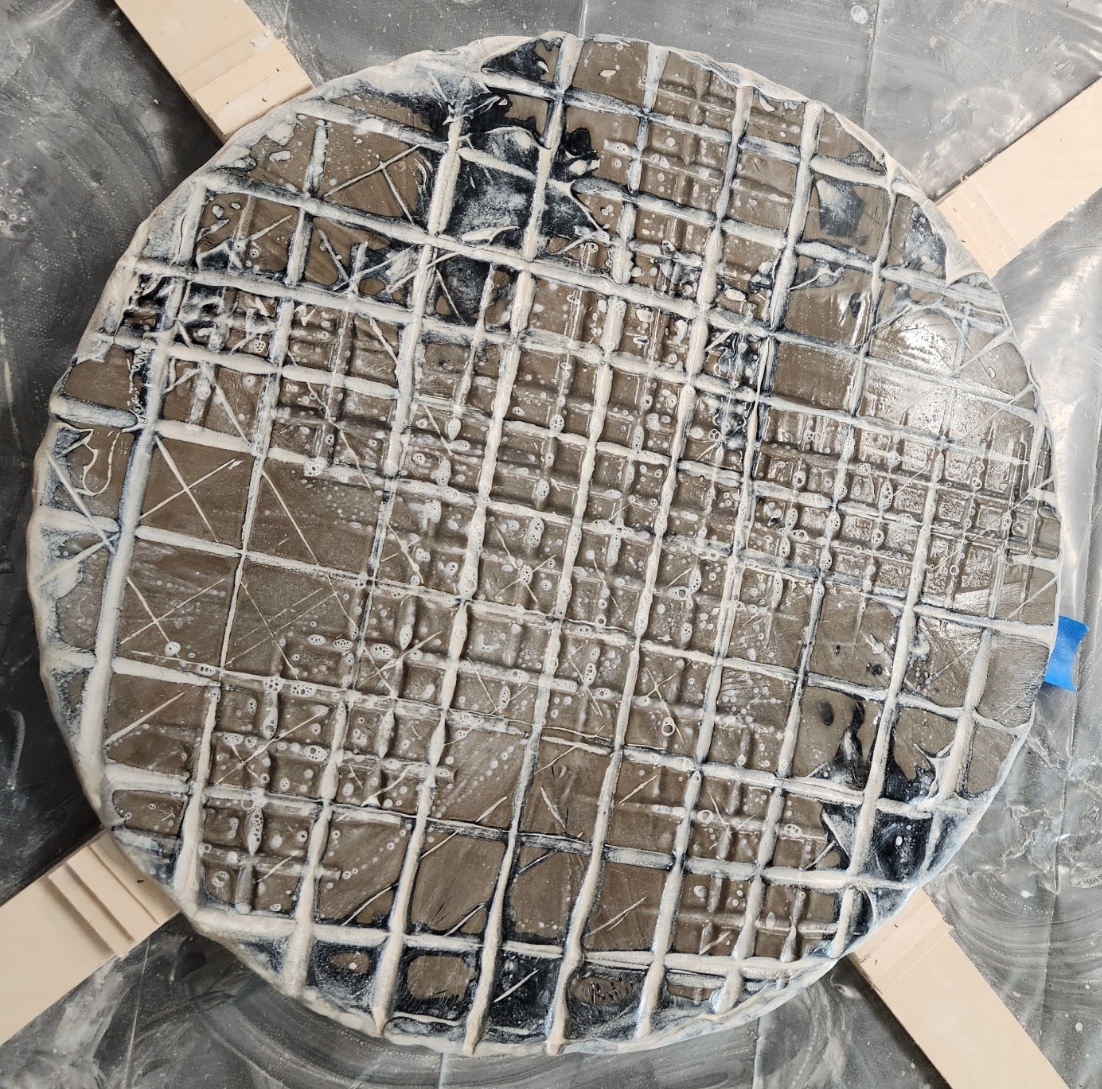
After several parabolizing attempts that ended in failure necessitating a return to spherical due to scratches, surface roughness and low narrow zones, I parabolized with a severely tapered contact pitch lap. I led with the center polishing preferentially. All work was done mirror on top of parabolizing lap using center over center strokes. I switched from machine to hand for the final sessions when I needed to guarantee that I ended with the mirror oriented the same as I started.
It took me about two dozen sessions over two weeks. Initial sessions were 2-3 hours long, final sessions 2-4 minutes long.
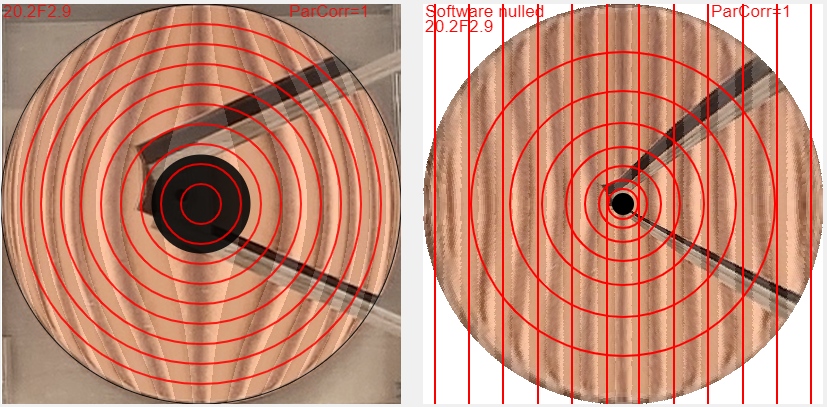
I use the Ronchi tape bands and the matching software nulled (and thinned) Ronchi Calc, verified as needed with the star test.
For a graphic showing the even parabolization at the 1st six stages of measuring (40, 60, 75, 85, 90, 95, 100 percent correction):
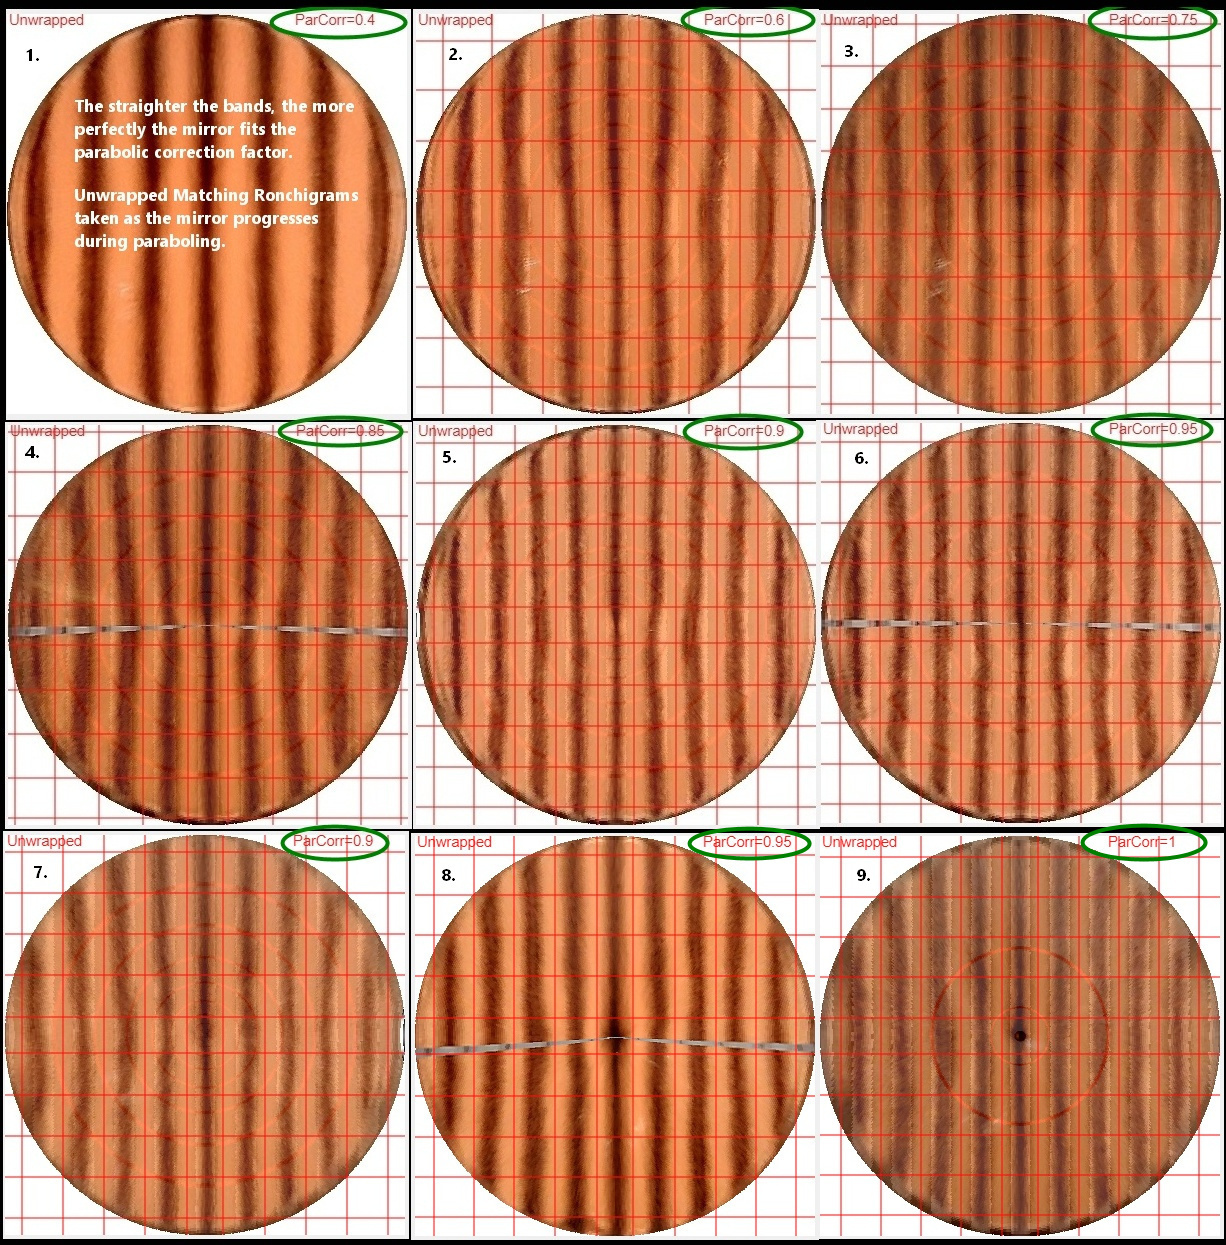
Also tends to result in a low 75% zone. Fix this by avoiding placing the 75% zone over the lap's edge while executing the extreme W strokes.
Note - all methods took about the same amount of time, about a dozen hours, to reach rough initial parabolization.
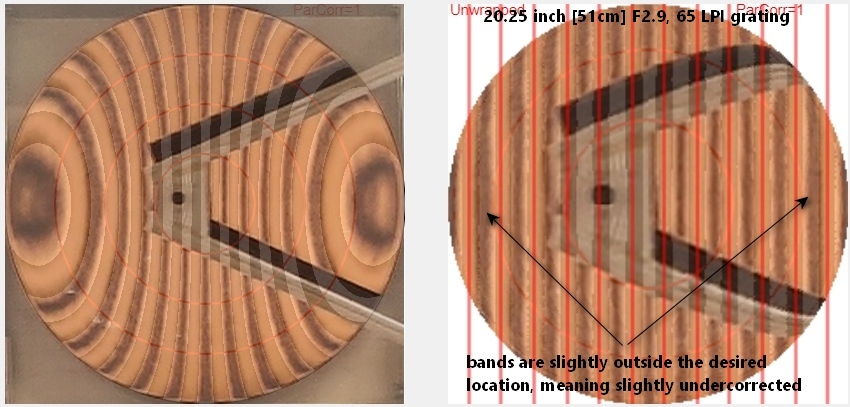
And according to the star test, this is slightly undercorrected (does snap focus though)
EOD