The mirrors have been finished and a telescope built that is producing astonishing images through the eyepiece.
It’s all about aperture to capture astronomical objects, enfeebled by the unimaginably vast distances. But large telescopes come with an extraordinary price tag and massive size and weight. My goal is creating larger mirrors that are lightweight, fast and inexpensive. The approach: thin meniscus mirrors, slumped and annealed in a kiln. The key: precision molds.
The result is a beautifully slumped piece of glass of constant thickness throughout. Any deviation means that the front of the glass will have to be ground down along with the back of the glass to maintain a constant thickness controlled to 0.002 inches [0.05mm]. Otherwise experience shows that thin glass may suffer from astigmatism as it is ground and polished.
Our makeup: David Davis has built a very large custom kiln and has figured out how to slump and anneal glass in large sizes. He is also experimenting with pie plate glass design. My contributions are the precision mold and parabolizing of F3.0 and faster mirrors. Others in our informal Oregon Scope Werks group contribute ideas, e.g., Jerry Oltion, Chuck Lott and Tom Conlin have pursued ball scopes and pseudo ball ('SudiBall') designs along with tracking mechanisms ('TrackBall'); also zero power minimalist pointers. You can read about their work in Sky and Telescope magazine and Amateur Astronomy magazine.
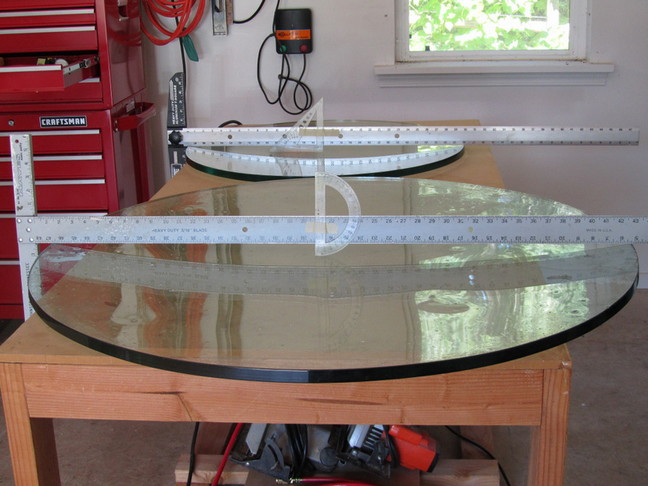
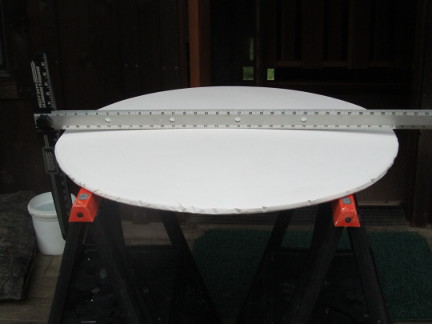
Two 30 inch [76cm] of 3/4 inch [2cm] thick plate glass mirrors have been successfully slumped to F2.8 and annealed. (Note the 10.5 inch F2.7 with slumped meniscus mirror in the background).
The mirrors have been finished and a telescope built that is producing astonishing images through the eyepiece.
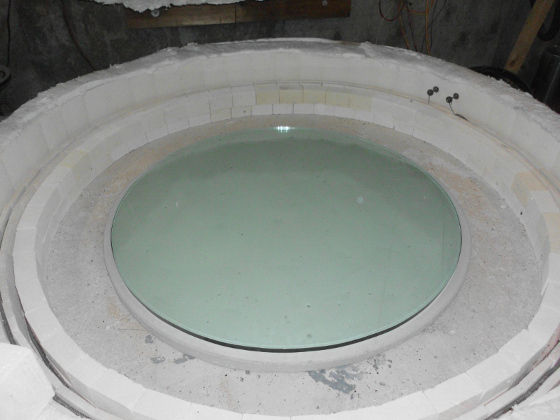
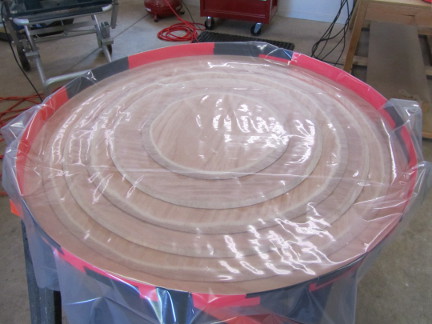
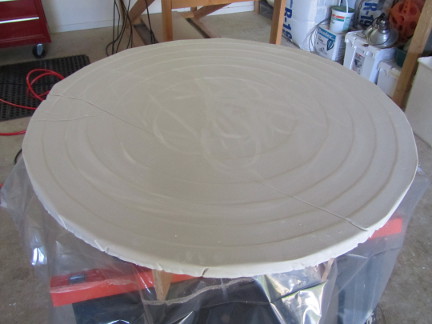
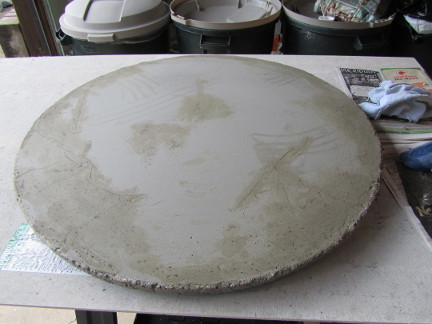
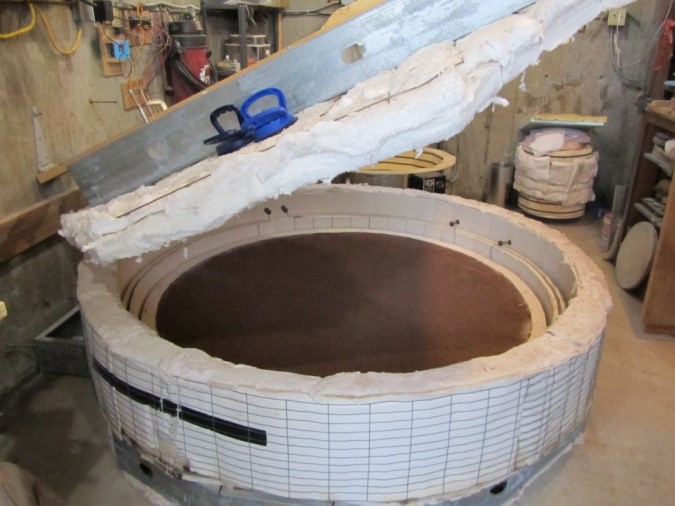
A 42 inch [1.1m] slumped to F2.8 sitting on its precision mold after annealing in the kiln; the F2.8 curves of the 42 inch with the 30 inch in the background.
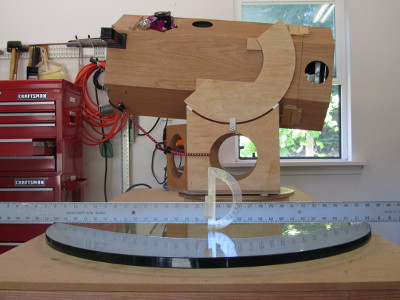
Here is a 13 inch [330mm] piece of glass 3/4 inch [19mm] thick that has been slumped to F/3.0, ground and polished. Next to it is a 10.5 inch [270mm] diameter that has been slumped to F/2.7.

After failing with a mold made from sand (see below) and listening to David Davis' advice on the resiliency of refractory molds, I decided to create plaster pre-mold masters precision ground to shape. The plaster pre-mold is used to cast the refractory mold that will be used in the kiln to slump the glass.
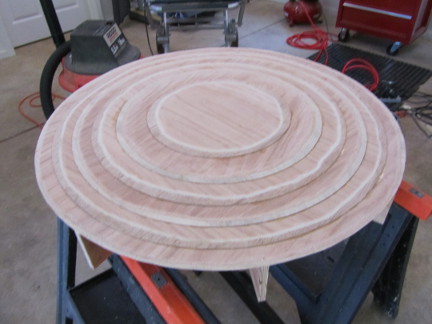
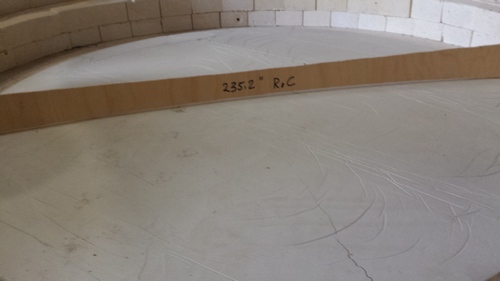
The first step is to create a convex wooden form to pour the first concave plaster mold against. Here is the wooden form for a 30 inch [760mm] mirror. The wooden form needs to be a bit wider than the final refractory mold, so it is cut to 32 inches [810mm]. I layered 1/8 inch thick [3mm] pieces of wood veneer upon a backing frame of plywood. (If cut cleverly, only two circles of veneer cut into rings are needed as the rings are stacked alternating from each circle). The front convex surface was sanded using a belt sander for half hour to achieve a smooth surface with no terraces. I calculated the diameter of the wood veneer pieces using the standard spherical sagitta formula in a spreadsheet. The resulting refractory mold is curved to a particular radius of curvature and can be used for any mirror diameter 30 inches [810mm] or under.
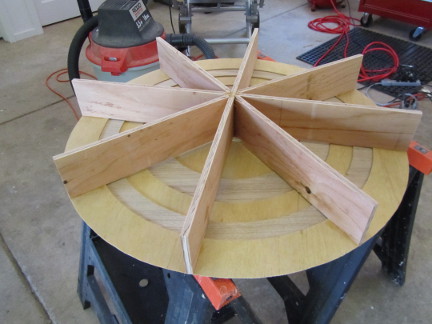
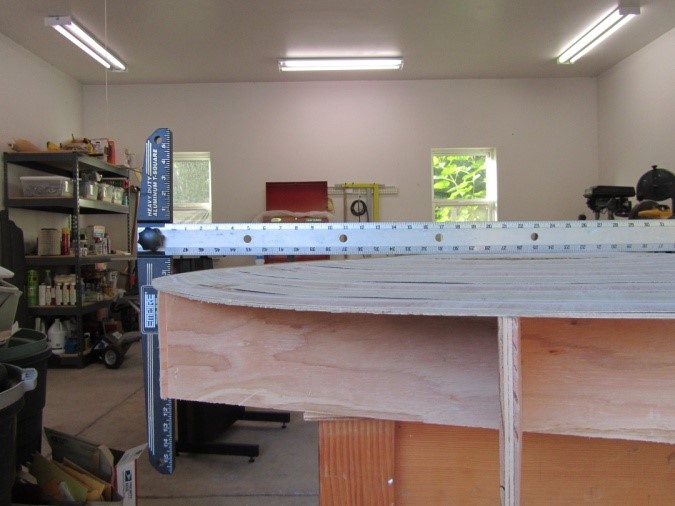
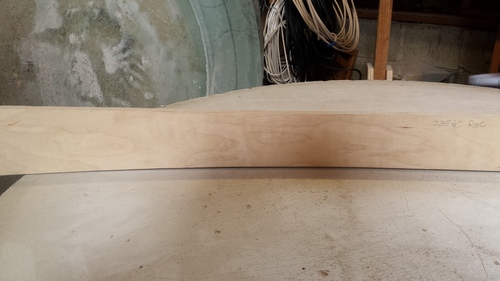
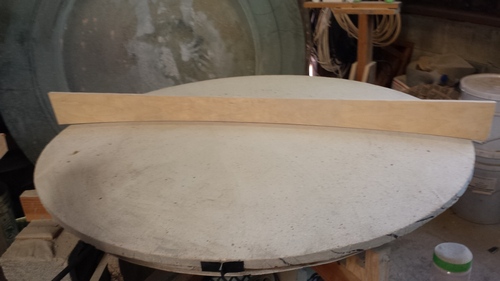
The curve of the wooden form for the 42 inch mirrors.
Next I poured an ordinary plaster mold using a single five gallon bucket of plaster mixed with water. This resulted in a mold that was approximately 1.5 inches thick [38mm].
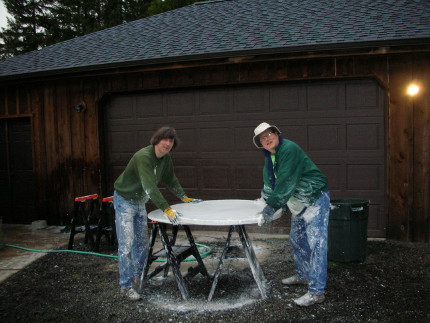
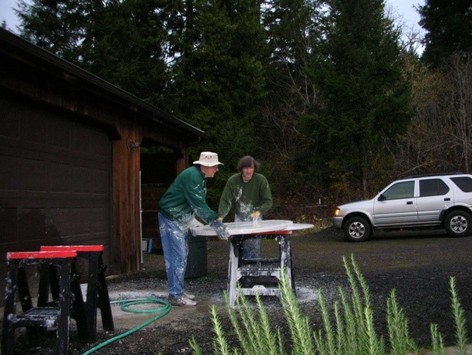
I next poured the second plaster mold using the first plaster mold to form it. Then using 60-90 carborundum grit, I ground the two together until their curves matched perfectly. This did not take long once the plaster absorbed copious amounts of water and began forming a white gooey layer that I periodically washed off. Here is Jerry Oltion (editor at Sky and Telescope magazine) and me grinding two 44 inch plaster tools against each other. As you can see it is a rather messy affair.
The results are beautiful: two plaster pre-molds, one concave and one convex.
The concave mold was used to make a refractory mold made from equal volumes of quick set mortar and vermiculite (a formula suggested by David Davis that has worked well for him).The mold weighed in at 35 pounds [16kilos] after drying.
Instructions: mix the quick set mortar with water using a mixing attachment to a powerful drill. Make the mixture slightly on the wetter or soupy side. Pour in the dry vermiculite and mix again with the drill. This fills up a five gallon bucket. Add water if necessary. Pour before quick set mortar begins to set in 15 minutes. Use a large trowel to smooth the back of the mold. This also presses the mixture down against the plastic sheeting resulting in a smooth face. Do not touch for at least one day. Set aside in a warm dry place for four weeks before drying the mold in the kiln with a hold at 200F until the steam disappears followed by a ramp up to 800F.
This mold was used to slump a 30 inch [760mm] mirror. Using it a second time caused it to deform. A subsequent mold was made from the same material but with chicken wire embedded. This has worked successfully to mold and anneal three 30 inchers, one of half inch thickness and the other two from 3/4 inch thick plate glass. Here are two molds, a 32 inch and a 44 inch (same material, but no chicken wire).
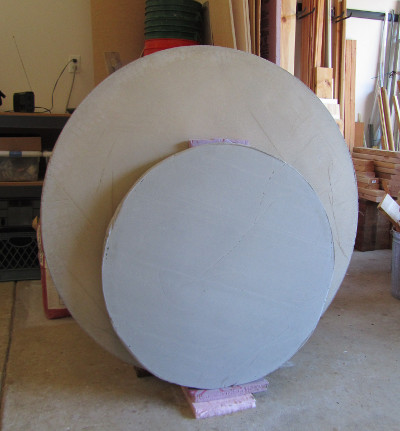
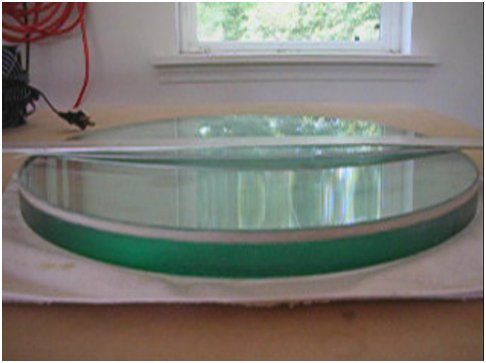
Here's the 30 inch slumped to F2.8 (11/16 inch sagitta) using the mold pictured above with my 10.5 inch [27cm] F2.7 in the background. The 10.5 inch scope fits entirely within the mirror blank. You can see that the anneal is very good indeed.
David's kiln:
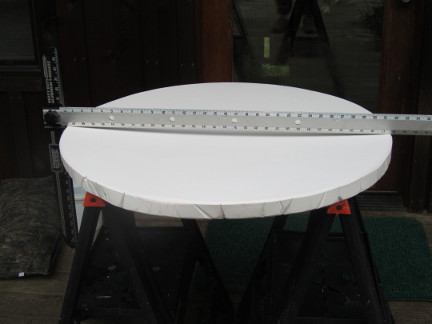
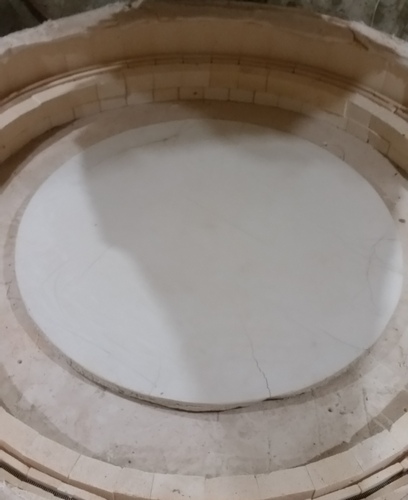
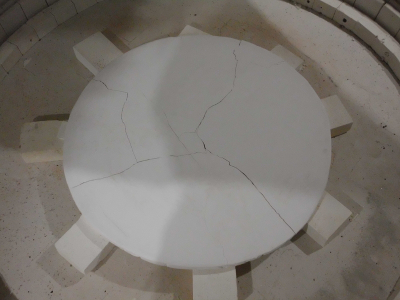
The 42 inch molds are proving more challenging. All three have cracked despite the embedded chicken wire. When they crack, the curve shallows out by a tenth of an inch or so. The issue appears to be thickness. The molds weigh close to 150 pounds as it is; increasing the thickness means doubling the weight making them practically impossible to handle. Also spalling is occuring where spots in the mold come off, embedding themselves in the glass, creating craters. I'm experimenting with regrinding the mold's curve after minor cracks and flattening. Here's the before and after images from a few hours grinding with ring tools.
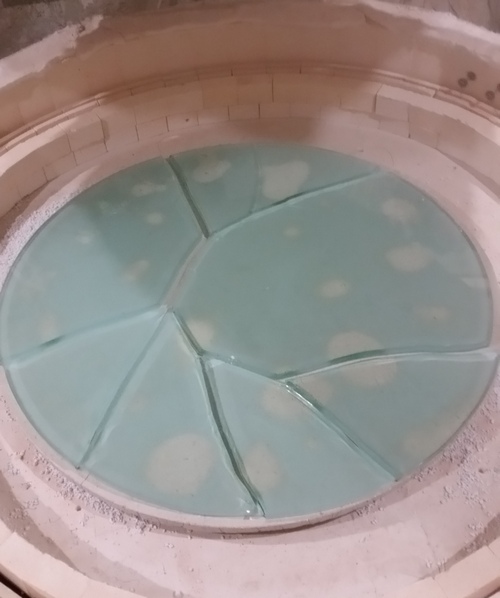
The 42 inch mirror explodes! After regrinding the mold, the previously slumped 42 inch mirror was placed on top for a second slump run. Part way through the heating, the mirror exploded with a noise that was heard from the house. Disappointing but exciting because that means that we don't know something. I surmise that the already curved glass fitted the mold too closely, the glass almost touching the mold lagged in heating as the kiln temperature was ramped up, causing too big of temperature differential between the top and bottom of the mirror.
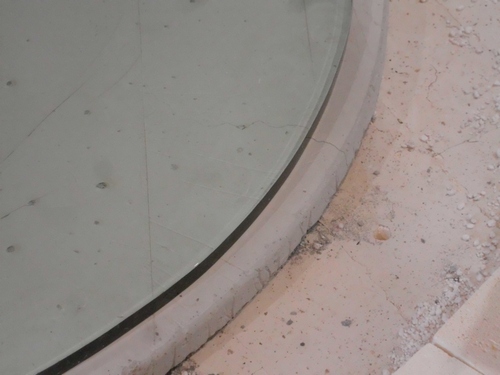
A second 42 inch mirror blank was slumped successfully against the precision mold. Grinding the refractory mold to exact radius of curvature also removed the skin from the mold, preventing spalling.
A mold made from plaster with equal amounts of silica to act as a refractory filler failed in a trial heating. Others report similar failures with plaster in larger sizes.
Other mixtures that failed the kiln heating test or worse, crumbled in my hands:
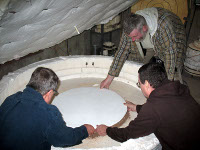
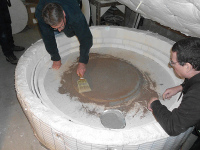
The beauty of sand molds is that you can take a curved form, say by bending a plastic pipe across a wood beam or say by cutting a curve into a wooden piece, and spin it around in a circle, carving out a shape in the loose, dry, refractory sand. The sand is contained by an encircling metal band with a diameter just smaller than the glass. In my case I used one of my precision plaster mold masters to press and work a shape into the sand.
Then the glass is placed on the metal band. Make sure you were a breathing mask. The dust coming off the sand is a breathing hazard.
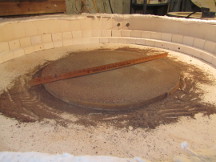
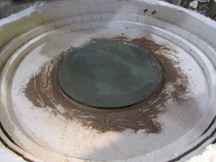
The result is a fairly good curve to the glass but with a flattened edge.
refactory plaster 44 lbs $67 (2024)
Peter Pekurar kiln shelf slumping molds
Tom Otvos 14 inch project
Kai Kretzschmar 47 inch project: slumping and grinding
Mike Davis's mirror and kiln projects
Mike Davis' youtube on cutting and slumping glass
Olivier Guyon's projects including telescope making, homemade kiln, glass slumping and carbon fiber backed mirrors
Harry's Bavarian slumping efforts
Rik Rokosz's slumping molds
eod