Flying over the rings of Saturn, zooming into the Andromeda Galaxy, traveling to our Milky Way’s galactic center – these are some of my dreams. No flying saucer? A telescope will do, one with a nice wide field, capable of high power and lots of aperture too. But it has to be transportable – not too long, not too heavy, and affordable.
For parabolic reflecting telescopes, it starts with the mirror: bigger, lighter, faster. Cellular mirror blanks are expensive. I began thinking; what about using just the cellular mirror’s curved face plate? Richard Schwartz slumped a couple of blanks in his kiln for me and I began to answer the question, would a thin curved meniscus mirror work?
Success! The 13.2 inch [34cm] f3.0 mirror performs fabulously and needs but a simple mirror cell, ditto for the 10.5 inch [27cm] f2.7.
Russ Genet formed the Altaz Initiative group and invited us to brainstorm to develop 1-2 meter telescopes at one-tenth to one-hundredth the cost. Everyone took a different approach or part of the problem to solve. Dr Lisa Broadhacker worked on resin and epoxy mirrors, Andrew Aurigema invented the StarStone mirror, still others worked on exotic combinations of materials, active-control of flexing mechanisms for thin glass, direct drive motors and no-reduction encoders. I decided to extend my work on thin meniscus mirrors. How far could I go?
Thin mirror precedents include John Dobson's 24 inch F6.5 mirror from 3/4 inch plate glass which was actually 25 inches diameter stopped down to 23.5 inches with a center thickness of 1/2 inch (I've found center thickness more correlated with deformations caused by bending and shearing than edge thickness) and David Davis' 16 inch F3 constant thickness meniscus shaped mirror slumped from 1/4 inch plate glass supported by a bed of flexible support points which produced astonishing aberration free images. Compared to these two mirrors, the 1/2 inch thickness of my 25 inch is hardly groundbreaking.
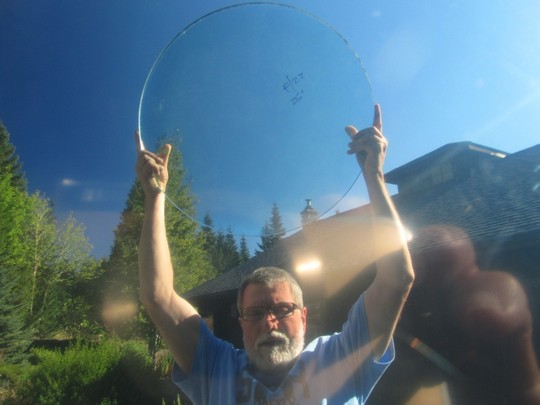
At the 2013 Altaz Initiative conference in Portland, Oregon, Greg Wilhite motioned me to his car. I'd been advising him on annealing slumped glass. He popped open the trunk of his car to reveal three 25 inch [0.64m] blanks slumped from 3/4 inch thick plate glass. I could hardly believe my eyes. He was offering me the choice of the litter in exchange for prominently mentioning his name. I lifted out a good looking blank and held it up to the clear blue sky, looking for tell-tale signs of strain in the glass using the polarized light of the blue sky. Greg mentioned that he over-slumped the glass figuring I'd like it more. A failure to communicate requirements! "How slumped is it?", I inquired. "Oh, about F2". I do not look gift horses in the mouth and took the glass with many thanks; nonetheless, I couldn't see how to make an F2 mirror work: I'd have to design a custom coma corrector and the tolerances would be beyond exact. Greg retired soon afterwards to Mexico and devastatingly died of cancer shortly after. He never got to see the finished mirror.
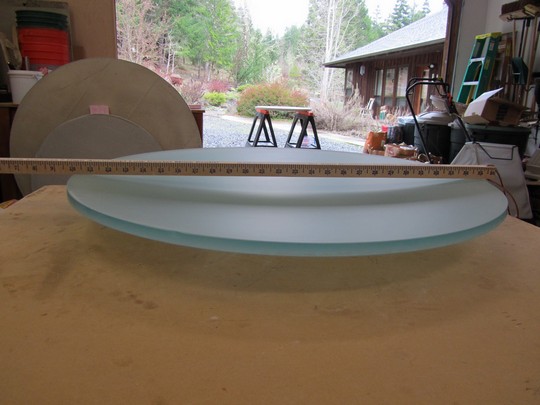
With trepidation, I decided to grind back the mirror's face to F2.6, balancing thinness of glass, a mere half inch [13mm] at the edge, against the extreme focal ratio. Attractively, the eyepiece height of such a telescope when pointed at the zenith would be at my chin. The thought of a no-ladder 25 inch sustained me more than once when I found myself filled with frustration. And after grinding the glass back to F2.6, the glass weighed only 25 pounds [[11 kg]. The prospect of a truly lightweight 25 inch telescope that I could lift up over my head also sustained me during difficult moments parabolizing the mirror.
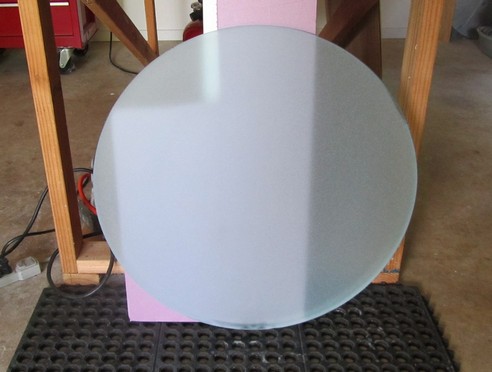
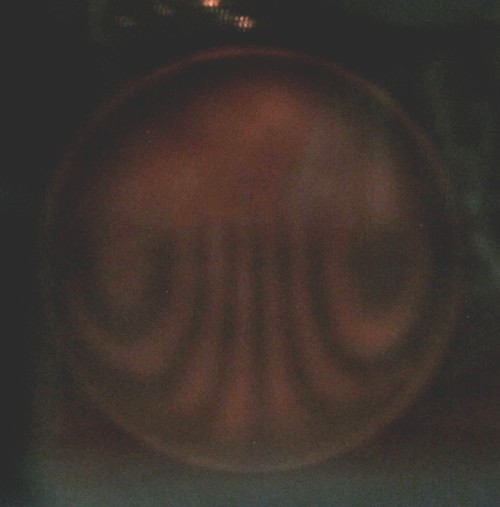
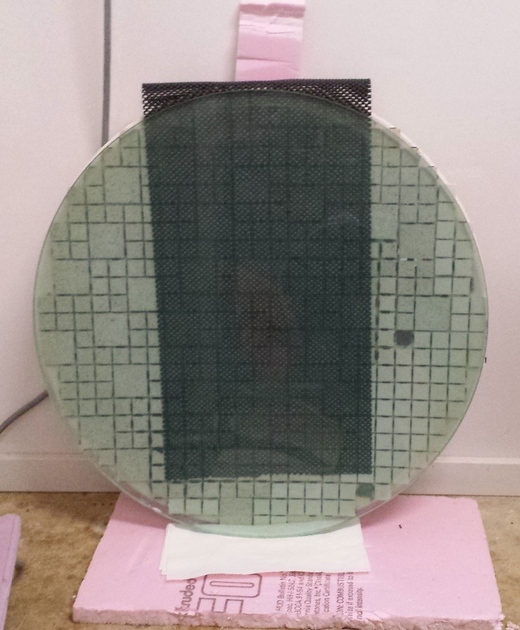
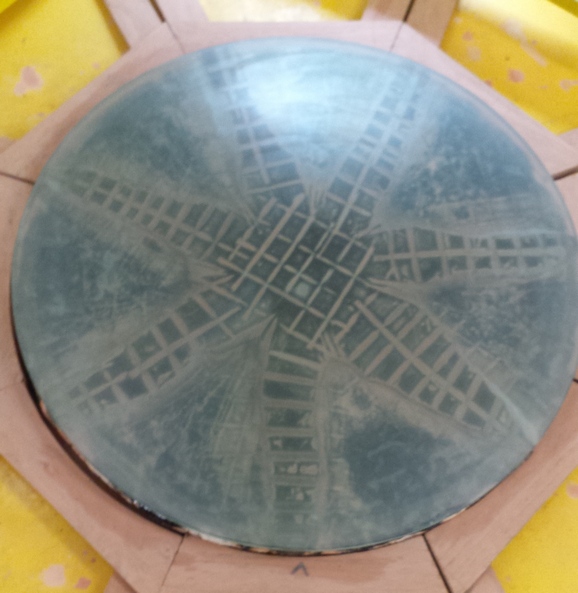
Here is the blank as received from Greg and an image taken through polarizing film denoting the absence of significant strain. The mirror was rotated to darken the light.
Could I control astigmatism in such a large thin blank? Could I mount it in the telescope without deforming the glass more than a millionth of an inch [0.025microns]? Would the mirror hold a regular figure of revolution? Could I find a coma corrector that works at F2.6? Could I parabolize such a large fast mirror? Succeed or fail – I needed this data point before attempting giant 1-2 meter glass.
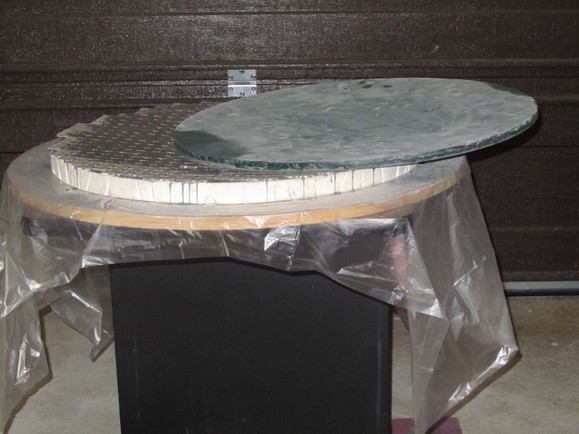
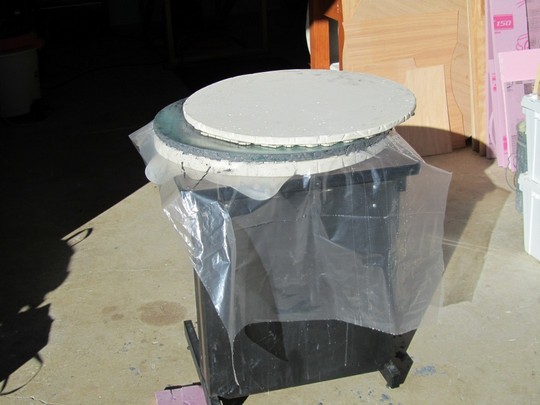
I started with turning the slumped glass into a blank ready for fine grinding. The back had to be ground to a spherical shape, the edges beveled and the front rough grind back to F2.6. This took months of hand grinding.
Here you can see the grinding of the mirror's back in operation, along with an initial flash grind of the back showing that the glass was slumped fairly evenly. The final image shows the back ground to a regular curve. It doesn't have to be strictly spherical - just regular without large low spots.
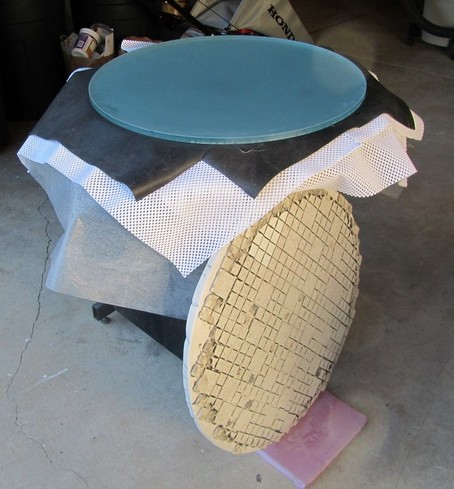
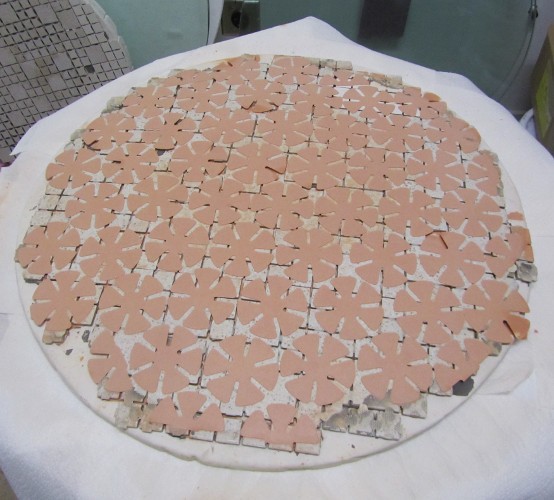
Next I ground the front surface using a grit sequence of 60-90 silicon carbide rough grit, 220 then 500 silicon carbide fine grit, finishing with 20 micron aluminum oxide. I used a stack with the tool used to grind the mirror's back at the bottom, then rubber no-slip maps as a buffer, then finally the glass resting on top that I ground face-up with a full-sized tiled tool. The last image in the sequence shows the mirror after 70 hrs of grinding. I made three attempts to grind down to 9 micron, but was defeated by scratches near the edge. Previous large thin blanks scratched at the 5 micron level; smaller thicker blanks I've ground all the way to 3 micron. This suggests that the blank is flexing at the edge of the tool and that the mirror and tool are not perfectly spherically shaped.
See the 500 grit pits remaining after two hours of 9 micron aluminum oxide?
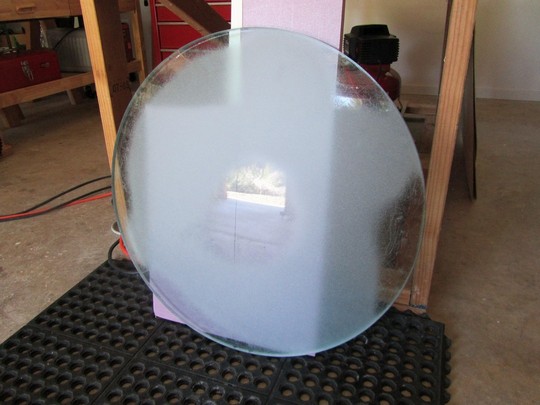
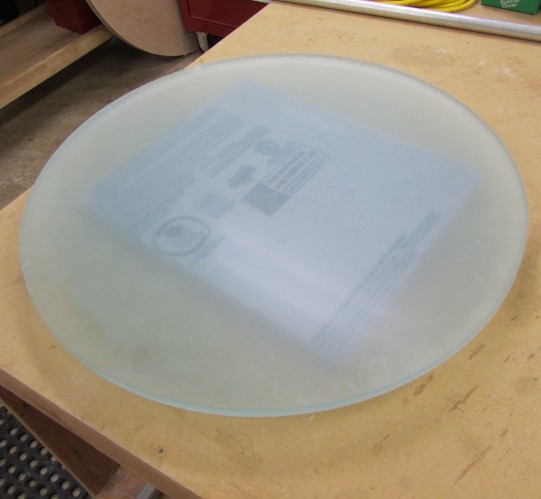
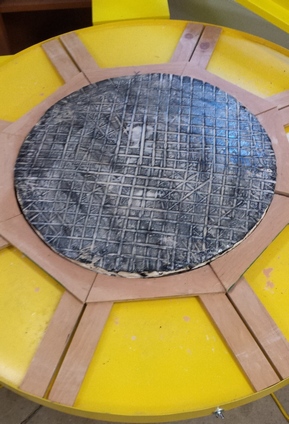
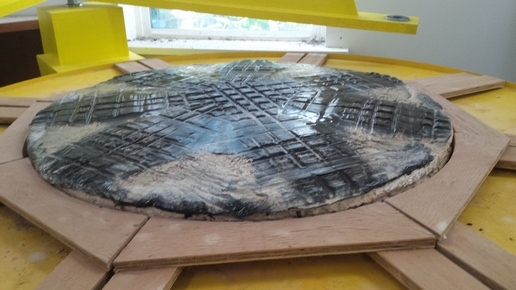
Here's the mirror ready for polishing, fine ground to 20 micron aluminum oxide. That's quite the deep curve!
Now it was time to design and build a polishing machine to polish the glass with polishing pads placed on the grinding tool.
More information, specifications, images and video available here...
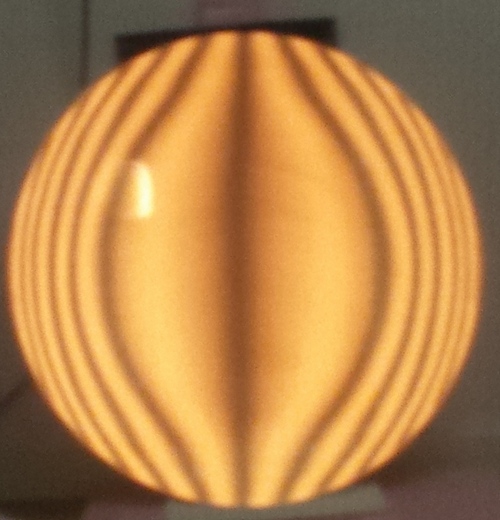
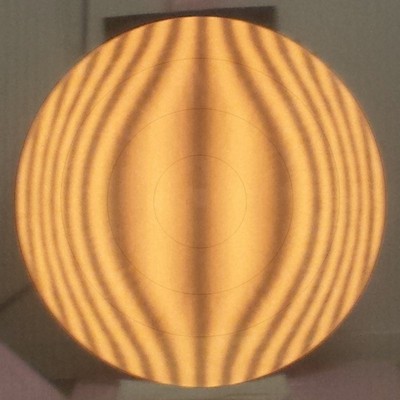
I polished mirror on top (MOT) with the grinding machine set for stroking. You can see the initial shine after 45 minutes of polishing. Take a look at the flash polish Ronchigram. Looks like the bands already curve. Unfortunately the image was taken with the ruled grating inside the Radius of Curvature (RoC), meaning that the mirror's curve is an oblate spheroid - the exact opposite of a paraboloidal surface. Despite the backwards figure, the mirror looked regular enough to continue on with polishing.
After 74 hours of quick and easy polishing on the pads using the machine set to one-third center-over-center (COC) strokes not a single pit remained. But the figure was the worst I've ever seen - yuck. The pad covered grinding tool was not spherical and would never bring the mirror's surface to a smooth starting surface for parabolizing.
I made a new Hydrostone plaster tool, primed the surface with a thin layer of Burgundy pitch thinned in paint thinner, then added a thick layer of #55 Gugolz pitch. With the shop temperature averaging 65F [18C], the pitch was on the soft side, crucial to highly aspheric (parabolic) mirrors.

I also wrote a pitch lap calculator to study the effects of petal laps and other shapes. This calculator proved predictable and matched polishing results.
After 45 hours of long strokes closer to one-half COC, the mirror's surface had not only smoothed out but had parabolized, in fact, overparabolized. This told me that I could reach full parabolization with a full-sized tool.
Actually, after developing running my Ronchi software null on the Ronchigram (I had not yet created the software), I see that I was actually quite close, not over-parabolized, in fact, the central portion was slightly undercorrected. Arrgh. I was nearly done without realizing it! If only I had known.

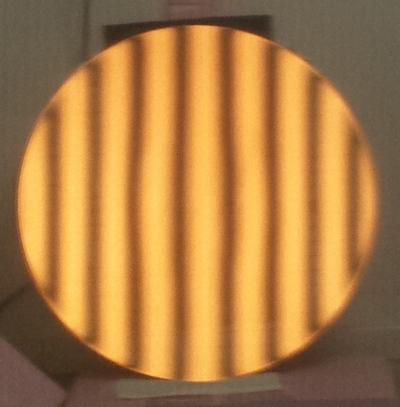
Using a full contact lap with 1/4 long CoC (Center over Center) strokes on the machine, I generated a pretty good sphere after 24 hours of machine time. For the discerning evaluators, note the high center and narrow turned edge.
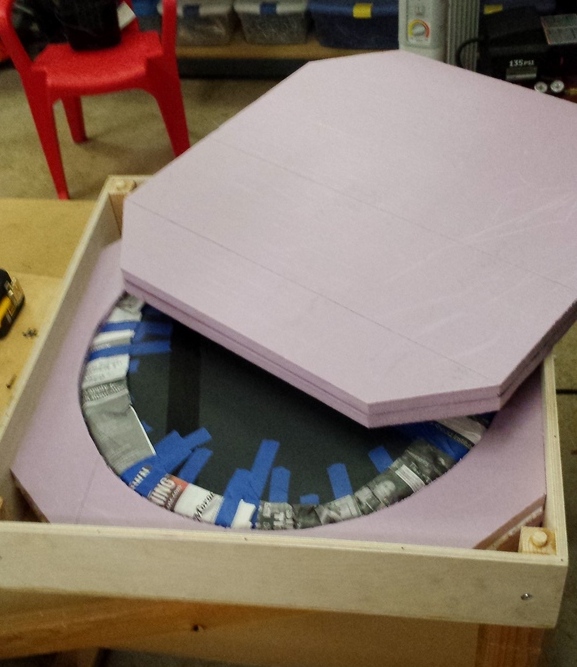
My test stand is simple: the mirror's back rests on a black no-slip matt that in turn rests on the grinding tool used to grind the mirror's back. The mirror's bottom rests on a piece of pink insulation. This proved quite effective and with some care in positioning the mirror, did not overly distort the mirror's surface.
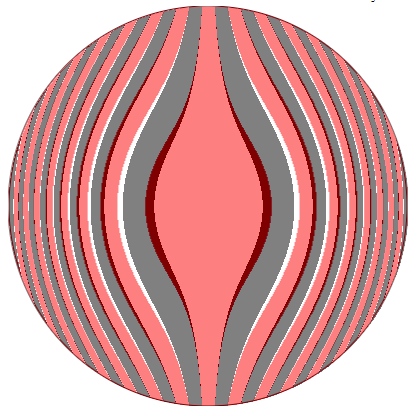
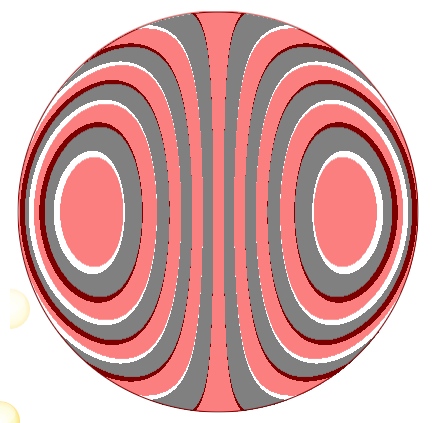
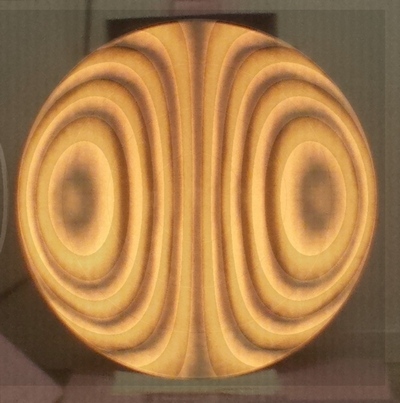
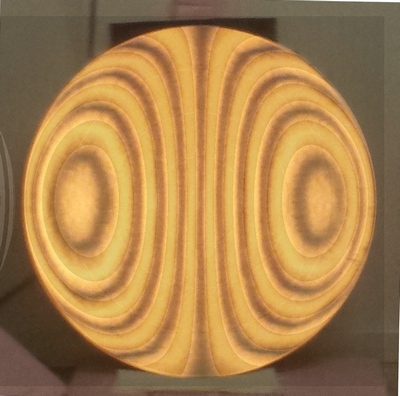
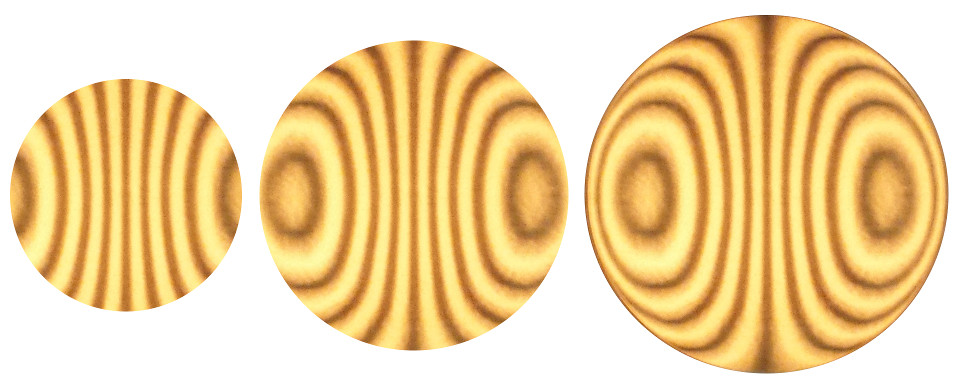
"Is the Ronchi test accurate enough to parabolize a 25 inch F2.6 mirror?" The first simulation shows a quarter wavefront error in the center and the second simulation a quarter wavefront at the edge. That means the Ronchi Matching Test can reliably detect errors less than quarter wavefront and reveal surface smoothness at the same time.
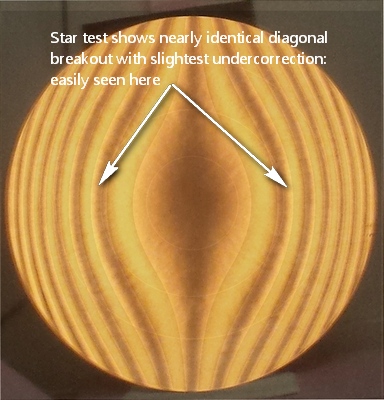
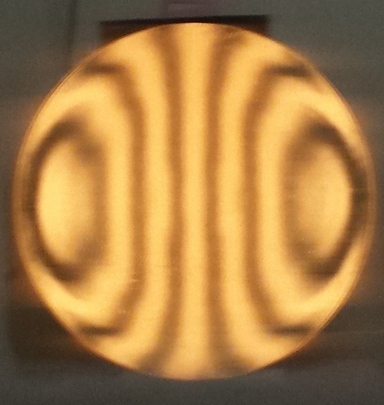
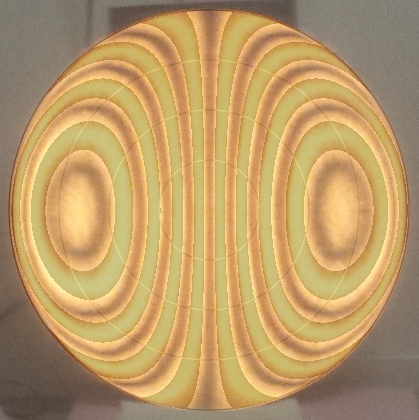
This Ronchi Matching test image was taken near the end of parabolizing when the mirror showed a good star test with slight undercorrection in that the diagonal breakout outside of focus took just a little longer (~1.3:1). You can see how the actual bands tack to the inside curve of the computer generated bands. Using my Ronchi error calculator, this is about 1/8 wavefront.
A change of half an inch [13mm] of Radius of Curvature (RoC) is apparent which means we need to know the RoC more accurately, say to a tenth of an inch [3mm]. I discovered the 'hard way' that as the mirror's center is lowered, the RoC shrinks significantly.
I found with my earlier fast mirrors that the outer portion of the mirror tends to parabolize first, then as correction is pushed into the center, it spreads outward eventually building up an over-corrected edge; the only recourse a return to spherical to try again. I determined to adopt an explicit 'center first' strategy. Even then I still pushed too much correction out to the mirror's outer zone resulting in two return-to-spherical-and-try-again episodes.
My process consists of identifying the high areas then concentrating polishing action on them. Repeat, repeat, repeat. This led to the next problem, zones.
As I tackled high areas on the mirror, occasionally zones, narrow high or low zonal rings, appeared. I spent many a frustrating hour tackling them directly. I found to my dismay that because of the extreme aspheric shape, the outside of the zone would resolve first, leaving an even narrower more steeply shaped zone to the inside. I literally chased zones across the mirror face. Finally, I had had enough, and decided to treat the entire mirror surface as if it were a smaller diameter mirror, ignoring narrow zones, trusting that they would resolve on their own. This worked.
I made a parabolizing petal lap, building on my experience with Mirror-On-Top (MOT) parabolizing of very fast mirrors using over-sized tools. My goal is a smooth surface; sub-diameter laps create a rougher surface. After 9 hours of 1/4 long CoC machine strokes I achieved rough parabolization. The Ronchi Matching test certainly does not look very good at this point.
I adjusted the mirror surface so that the Ronchigram matches closely to the computer generated prefect Ronchigram by using my Ronchi Matching test. By comparing bands I could see which radial zones of the mirror were high and lagging behind parabolization. I concentrated polishing action on the high zones and avoided polishing the low zones by warming the pitch with a hot air gun, then using a wet wooden dowel to depress the pitch or channel the pitch causing pitch squares to pop up. I polished for 5 to 20 minutes per session then inspected. After two hours of work, the mirror still does not pass the Ronchi Matching test but in my experience is ready for a quick initial star test looking for subtle astigmatism and to verify progress.
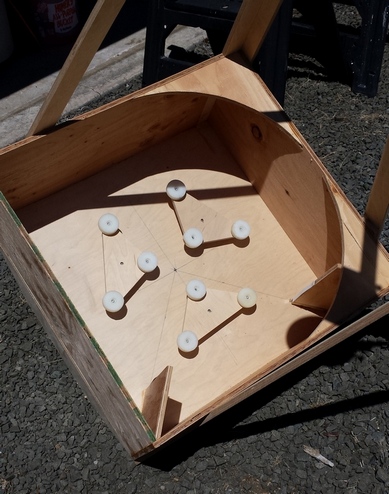
Surprisingly with my 13.2 inch [34cm] f3.0 mirror and my 10.5 inch [27cm] f2.7 mirror I found that these thin lightweight meniscus or curved constant thickness blanks worked well on rather simple 3-point flotation cell. My standard is a near-perfect high power star test. I have seen the deformations caused by 3 point supports on full thickness 12.5 inch and 14.24 inch mirrors. For the 25 inch [0.64m] I use a 9 ring support (analogous to a 27 pt support that is composed from 9 triangles).
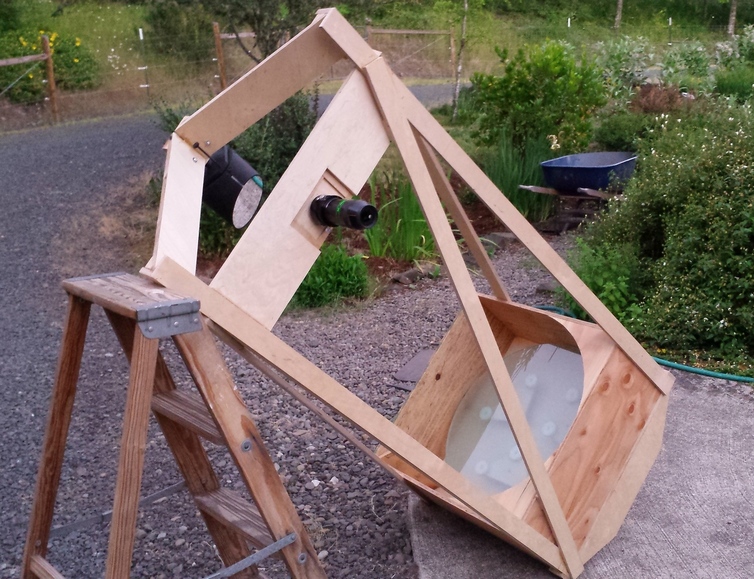
It's quite a moment. All this effort and I still don't know if the mirror will work - even minor astigmatism ruins the high power star image. My mind is filled with plans for warping harnesses to fix potential astigmatism. I move the star test rig a bit and in pops Polaris. I carefully focus, holding my breath. In goes the high power eyepiece. I slide back and forth through focus. No astigmatism! Astonishing. Wait, I can detect no deformation due to the mirror cell either. After a long period inspecting the star test images I conclude that the mirror cell is good enough for now. As the image improves, I'll have a better chance to check for cell induced aberrations. But, wow, what a relief, the project can go forward with one of the major questions answered.
Continuing with the Matching Ronchi test, I worked the mirror's surface until the mirror could focus the light from all zones into a tight bundle. This took about two more more hours.
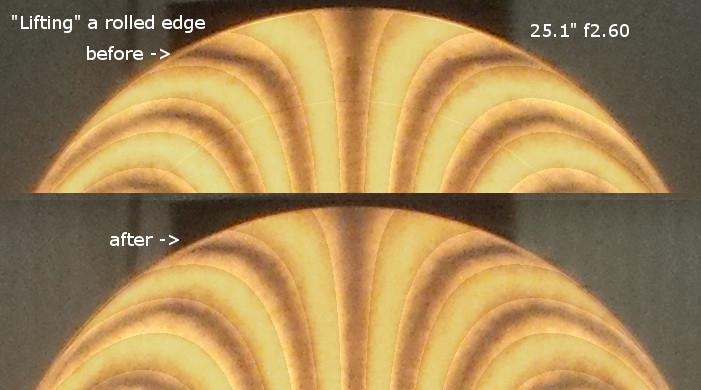
The mirror's outer zone became flat and rolled. How to fix? I decided on a strategy of very short strokes along with extra pitch contact at the 94% zone. I managed to 'lift' the edge, unrolling it and bringing back it's long focus.
Forget astigmatism, forget the mirror cell: the biggest problem with this mirror is the extreme parabolization required. Getting all the zones perfectly parabolized is a challenge far beyond any that I've faced previously. I discovered that very short CoC strokes with the petal lap adjusted for zonal contact was key, followed by 1/3 CoC smoothing strokes with the petal lap adjusted for good contact from center to edge.
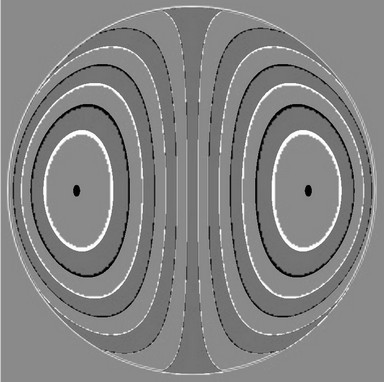
This image shows the extreme increasing parabolization required for F4, F3 and F2.6 at the mirror's RoC of 131 inches [3.33m].
After four more hours of figuring in sessions ranging from three minutes to six minutes, I finally passed the star test. The mirror's edge is a little rolled, maybe 1/6 wavefront, otherwise the intra and extra star discs look similar with a nearly equal diagonal breakout. Portending well is Polaris' companion at high power as a pinpoint white speck floating nearby.
Somewhere in the intersection between personal skill, Ronchi Matching test and star test results, risk of making the mirror's profile worse and having to start over, the 'observer' seizes the mirror from the 'maker' and sends it off to be aluminized. It is difficult to stop the drive to remove every imperfection: there is always one more touch-up session that could be attempted.
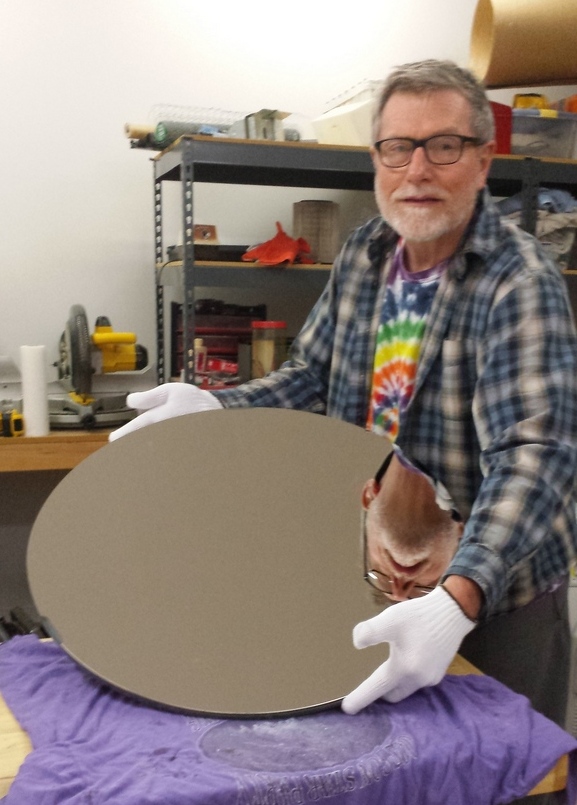
Coating a 25 inch or larger mirror is a non-trivial problem. There are few coaters who can handle this size; pricing more than doubles from that of a 24 inch mirror. I settled on OMI (Optical Mechanics Inc) because I like their enhanced IBAD coating (I want as many photons reflected as possible), price, and location. Packing the mirror is also a problem as others have had their large mirrors damaged in transport. I saw that their boxes broke at the corners when dropped so I determined to build my box with strong corners and rounded edges. To avoid breakage, coaters now recommend that the mirror box be strapped to a pallet. But this mirror is quite lightweight at 25 pounds so I didn't go to this extreme. I ensured that the mirror was surrounded by two inches in all directions of solid pink insulation board. I shipped FedEx out and OMI shipped UPS back to me with no issues - whew! The mirror looks spectacular - a beautiful coating with no haze or scatter, not a single scratch or pit.
Yes, a 25 inch [0.64cm] F2.6 that is half-inch [13mm] thick can be made by an amateur telescope maker. The greatest challenge by far is the extreme amount of parabolization required. Astigmatism and good mirror cell support are solvable issues. I also determined that the TeleVue P2 coma corrector worked well in that the stars are sensibly round near the edge of the 100 degree low power eyepiece. Also I inspected carefully for vignetting due to the P2's two inch diameter barrel and didn't see additional vignetting beyond that of the minimum sized diagonal. I anticipate using the three inch P2 version for imaging on big chips though.
Thanks to David Davis, I have thin slumped 30 inch [0.76m] and 42 inch [1.07m] blanks of 3/4 inch thickness ready to begin the process again!