Polishing a mirror is one of the great joys you will experience as a maker and builder. It's also arguably the most accurate surface made by man or machine. If the mirror is expanded to the size of a football field, then the mirror's surface will be smooth to 1/1000 inch or 1/30 millimeter! Polishing a 10.5 inch [27cm] F/2.7 plate glass meniscus shaped mirror.
The Goal
The goal of polishing is simple: polish out all the tiny pits that remain from fine grinding, ending with a smooth spherical mirror surface ready to parabolize. You will use a strong focused flashlight and magnifying lens to look for any remaining pits and a Ronchi tester to look for a smooth mirror profile.
What is Polishing?
Polishing is a mechanical chemical process where glass is chemically sheared by the polishing compound after being softened by water. It’s most important to come to grips with the factors that influence polishing, namely pressure, velocity and polishing agent. Polishing is proportional to time (the more time spent, the deeper the polish), pressure (press harder to polish faster), speed (stroke faster to polish faster) and type and amount of polishing compound (cerium oxide is faster than rouge). Of course, too fast of polishing results in sub-optimal results. See chemical mechanical polishing
Pre-polishing with Pads
A pre-polish can be obtained quickly, saving time overall, with the use of polishing pads. Use only pads from the same roll as pad thickness can vary from roll to roll; fiercely press them onto the fine grinding tool that has been thoroughly dried; charge the pads with cerium oxide mixed with a little water; then polish letting the pads run fairly dry.
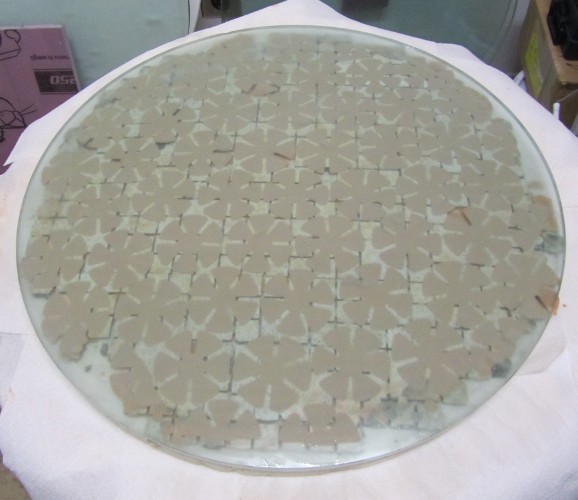
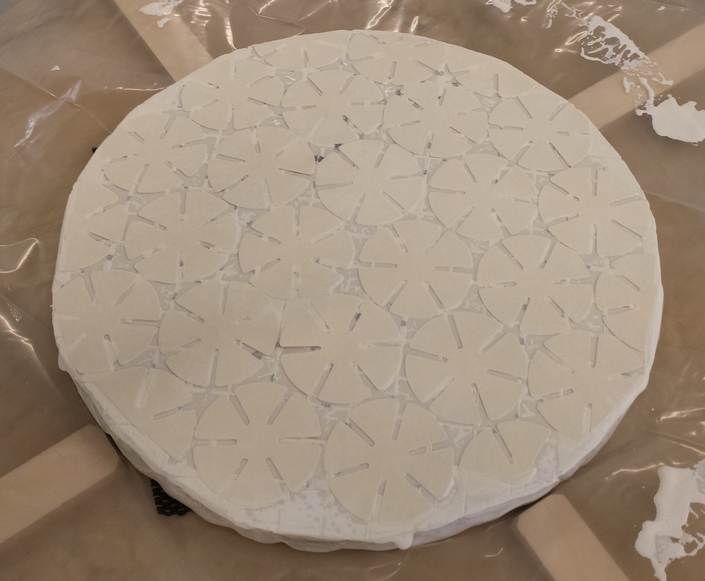
Here is a 25 inch mirror on top of the fine grinding tool with pads applied.
And here is the result after 5 hrs of machine polishing starting from a 20 micron aluminum oxide grind. Note that the edge is not as reflective.
Polishing pads on a 16.25 inch [41cm] tool.
Pad polishing a 30 inch [76cm] mirror. Initial flash polish Ronchigram followed by an image of the pads on the tool then an image of the polishing machine in action, finally haze has retreated to the extreme edge after a few hours of pad polishing.
Materials Needed
Pitch is used today to polish amateur telescope mirrors, though any soft material will work to some degree such as felt, paper and even plastic. Pitch was first used by Isaac Newton three hundred years ago. Polishing compound is either cerium oxide or rouge, the former being much easier to work with though currently expensive thanks to global political-economic factors. Occasionally you will hear of super polishing agents. You don’t need them.
The greatest impact on mirror surface quality is your technique: heavy smooth slow strokes with the mirror across the pitch lap after achieving perfect contact between glass and pitch, keeping the pitch lap wet with a drop of dishwashing detergent and the optimum dilution of the polishing compound.
I like Gugolz pitch because it maintains the desired viscosity over a wide range of temperatures. Acculap, a synthetic pitch, is very clean and easy to work, though the range of temperature that it works best in is narrower in my experience. Gugolz pitch comes in various viscosities. Pick the variety that is just below your shop temperature. I use #55 in my workshop which typically runs 60-65F [16-18C].
Making the Pitch Lap
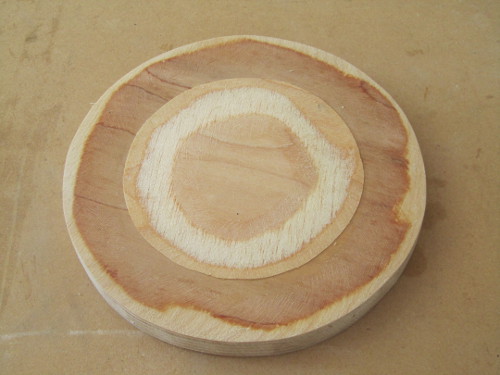
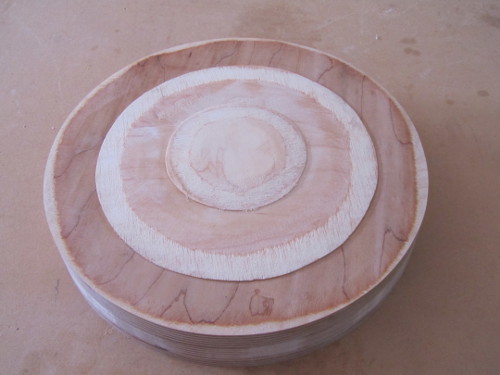
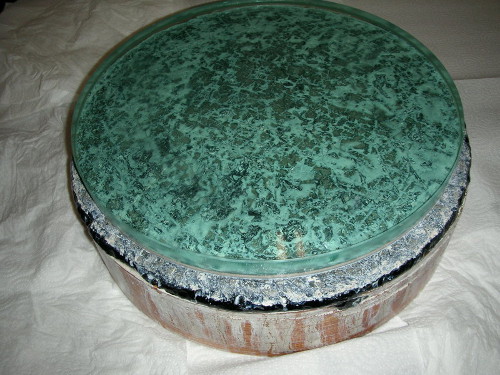
I make my polishing tools from high quality plywood like ApplePly and from Hydrostone plaster. My 7 inch [18cm] lap is made from a single thickness of 3/4 inch [2cm] plywood. The 11 inch [28cm] lap is made from three layers of plywood. Scale accordingly. Note the thin veneer layer on top because these two mirrors happen to be very fast and deep, F/2.7-2.8. It's important to keep the pitch approximately the same thickness from center to edge because thinner pitch acts harder and thicker pitch acts softer. If your sagitta is 1/8 inch [3mm] or less then don't worry about this extra step. If pouring pitch over a plaster or tiled tool, mix a little paint thinner with Burgundy pitch so that the pitch can better stick to the tool.
As an advanced technique, I make my laps slightly oversized. This is a practice that goes way back to at least the start of glass mirrors and pitch tools. Brashear used oversized laps over a hundred years ago. Professionals use them today (see Strong's Procedures in Experimental Physics). The 7 inch [18cm] lap is for a 6 inch [15cm] mirror, the 11 inch [28cm] lap for a 10.5 inch [27cm] mirror. My experience is that any lap size can be made to work. However, laps that are exactly the same size as the mirror with the pitch trimmed back 1/8 to 1/4 inch [3 to 6mm] can result in frustrating turned down edges. That's because this outer strip at the edge receives less polish (the polishing tool is slightly undersized) and lags behind the ever shortening radius of curvature or focal length of the mirror. Most amateur techniques tend to reduce the focal length by a fraction of an inch, a few mm. One observation that supports this is that most amateur mirrors polish from the center outward.
Knowing that the pitch's edge will be trimmed back, make the pitch tool slightly larger so that the mirror's face is completely in contact from far edge to near edge. I like to make my laps a bit more oversized: this gives me more control over the edge. Mirror makers from centuries ago knew that the magic ratio of 6:5 meant that the mirror would not change focal length and that the mirror would polish evenly from center to edge. However, an oversized tool this big can be awkward to press, so I compromise.
Pouring and Shaping the Lap
The whole process takes maybe 15 minutes and goes quickly and smoothly. With a little practice you will be making great pitch laps. The first time or two and the occasional bad day can be difficult. I've accidently poured pitch onto the floor, filled the kitchen with pitch aroma, ruined good clothes, burned my fingers, dropped the pitch lap (of course they always land upside down on their face) and otherwise messed up. Power through these bad days - don't give up easily.
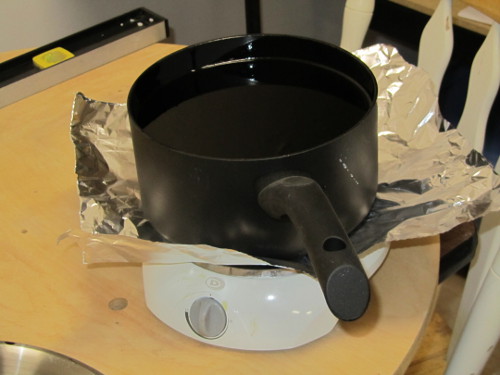
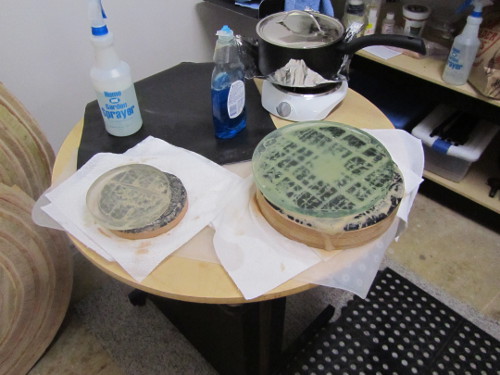
Get a hot plate with a clean old pan to melt the pitch.
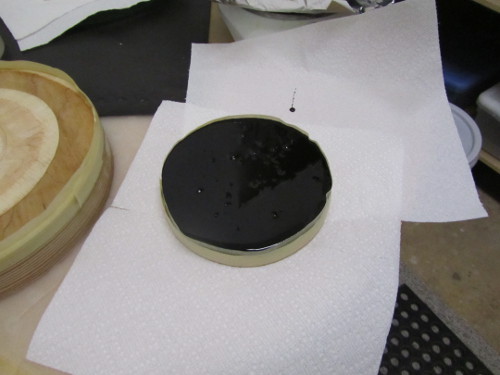
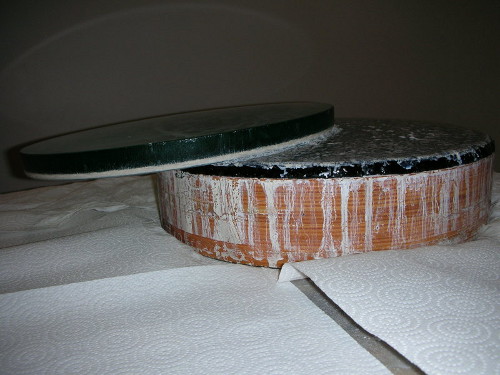
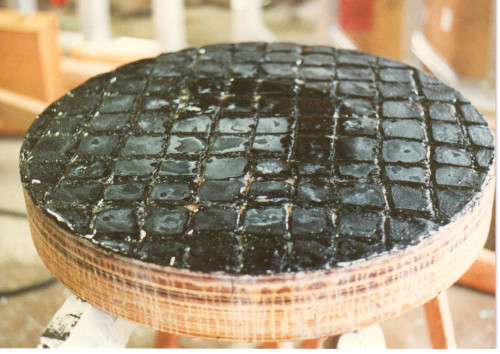
Tape up the sides of the tool with masking tape (survives the hot pitch the best) and pour the pitch. Pour the pitch as soon as it is pourable. Don't wait until it is smoking hot and as slippery as water. Here's a 7 inch [18cm] lap moments after pouring. You can see a few bubbles slowly rising to the top.
How thick should the pitch be poured? I like 1/4 to 3/8 inch [1cm]. Thicker and the pitch acts softer; thinner and the pitch acts harder. Use this fact to deal with pitch that will be too hard or soft otherwise. Here is an image of the 7 inch [18cm] diameter lap, poured to the recommended thickness.
That Magic Moment When the Pitch is Just Right
Have a spray bottle filled with water and a few drops of dishwashing detergent. Test the pitch by pressing on the masking tape sides. When the pitch becomes stiff enough to not pour off the tool's edge, rip the masking tape off with quick decisive pulls parallel to the edge of the tool. Spray the lap and soak your fingers. Using your fingers, take a few seconds to shape the lap as needed: keeping the edge up in place and squeezing a bit of pitch towards the center (if you have a deep sagitta).
Here's a 7 inch [18cm] that's been finger shaped. Remember to keep your fingers wet! Hot pitch sticking to your fingers cannot be quickly removed and will burn.
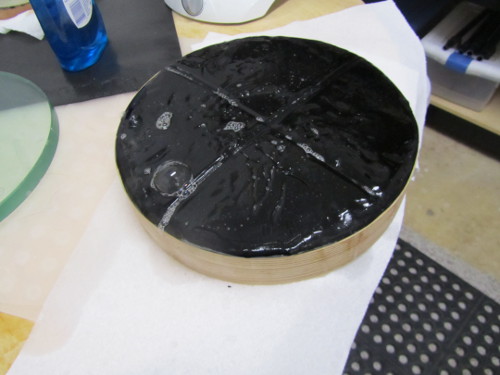
Quickly take a long piece metal or wood, soak it with soapy spray and press in a couple of channels for the air to escape when the mirror is first pressed on the lap. Here's the 7 inch [18cm] lap and the 11 inch [28cm] lap. Larger laps benefit from more channeling.
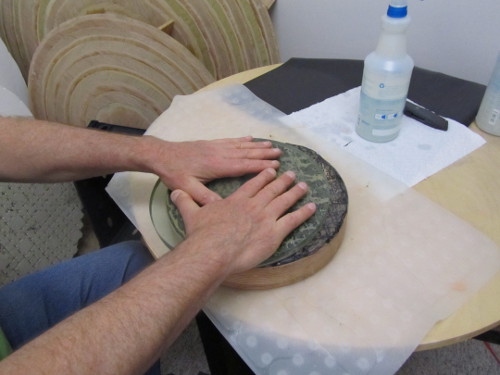
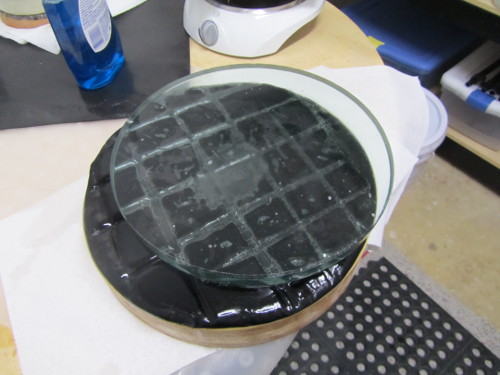
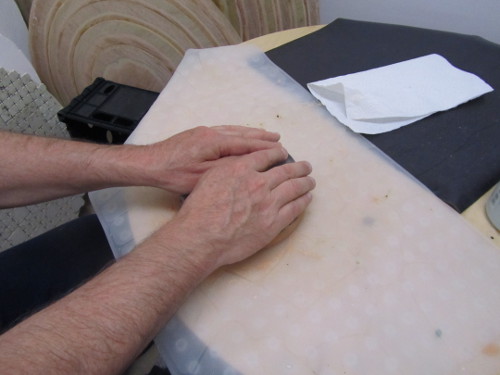
Now soap up the mirror's face very liberally and press it on the lap, at first using just the mirror's weight then later pressing down hard with your hands. Press to gain contact as you can and when contact slows, slide off the mirror, re-channel the lap and press the mirror on again. A couple three of these cycles should result in full contact. Here are the same two laps after being pressed into full contact. When working an oversized lap, move the mirror around every few seconds as you can see in the second image. Aim to achieve full contact about the time the pitch becomes too stiff to work.
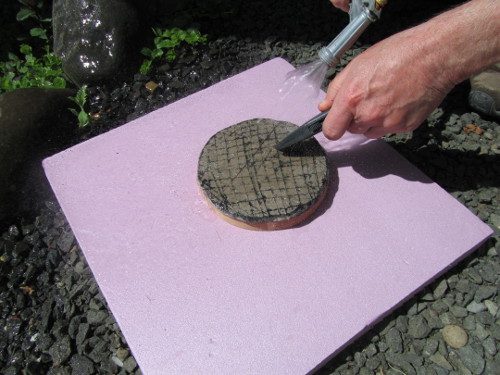
Now, pour cold water over the lap to stiffen the pitch so as to maintain its shape. After several minutes you can micro-facet the lap by an X-Acto knife cutting across the surface at an angle while under water or under a water spray (this to contain flying pitch pieces, which can become very messy and difficult to remove later).
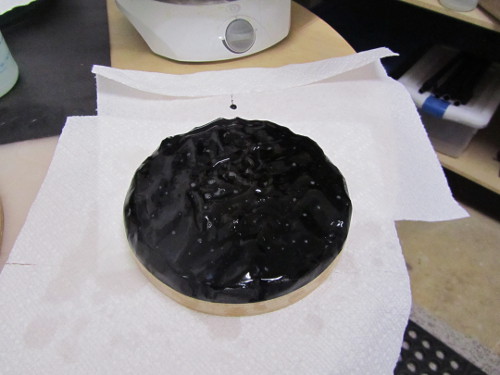
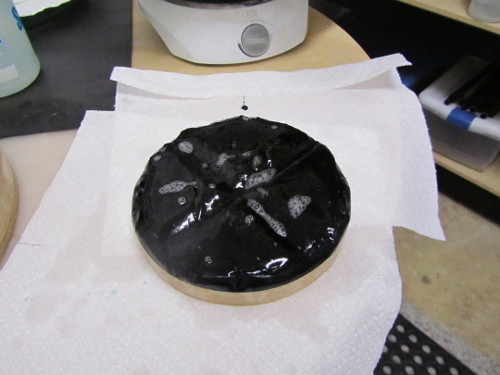
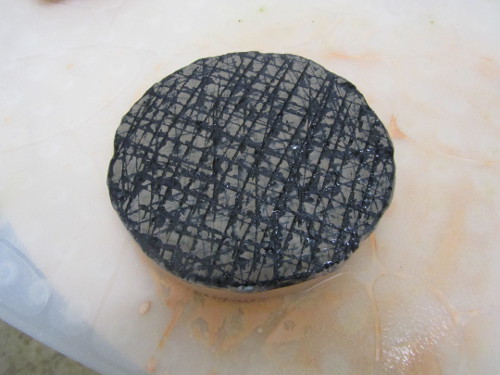
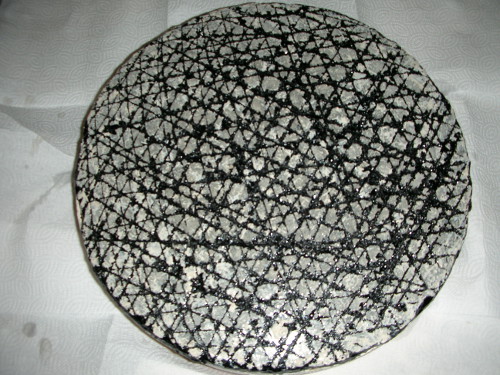
The result is a micro-facetted polishing lap ready to go.
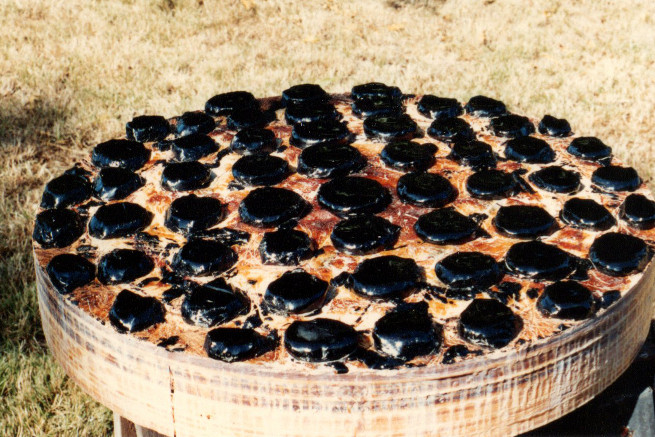
Oversized laps
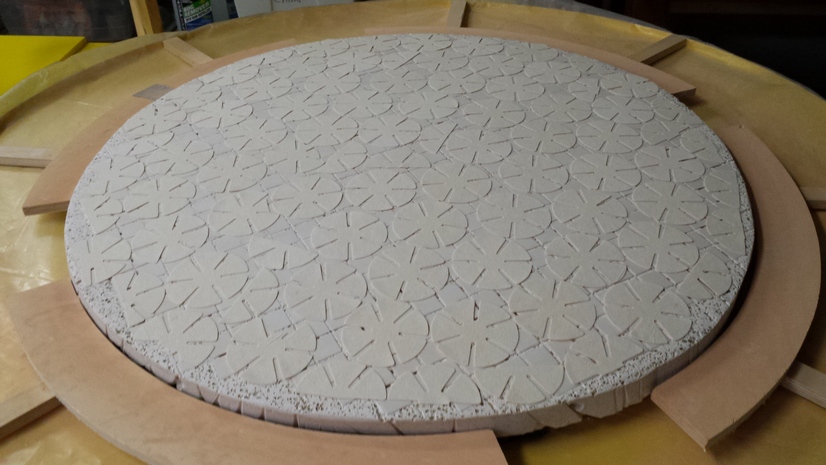
I like to use oversized laps because they tend to do a better job of polishing a clean edge that is not turned down. Here are 7 inch [17cm], 11 inch [28cm] and two images of a 14.5 inch [37cm] lap. Note that one of the laps is missing contact in the center. This is not an issue: laps can be fairly irregular in contact and still do their job.

Here is the 13.2 inch [34cm] F3.0 mirror being polished face-down on top of the oversized lap.
Mirror on Top or Tool on Top?
Having done both for many mirrors, I prefer Mirror on Top (MOT). The polishing agent lasts longer because it sits in the channels and microfacets, the chance of scratching is greatly decreased because the offending particle sinks into the pitch almost immediately, it is easier to obtain a smooth hard drag when polishing and the mirror is naturally supported on the pitch lap (an elaborate mirror support is not needed).
The largest full sized tool I've made is a 30 inch [76cm], so it is possible to make very large pitch laps if necessary. Our predecessors used very large grinding and polishing tools to ensure a regular astigmatic-free surface.
Here are some large laps that I have made in years past. First, an early fiberglass encased plaster 30 inch [76cm] lap, then a later wooden 30 inch [76cm] lap, and finally another 30 inch lap done on a wooden tool.
The Initial Flash Polish
Mix the cerium oxide with water in a 1:10 ratio in a little squeezable pour bottle.
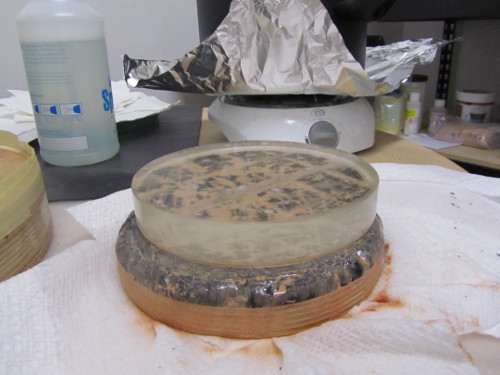
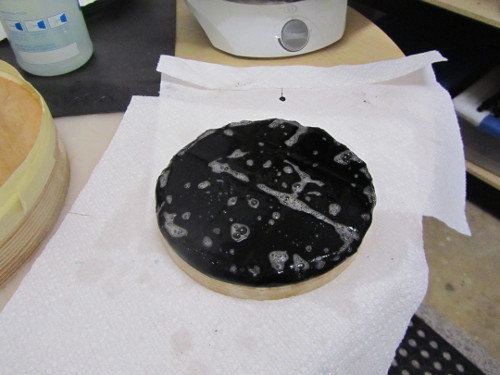
Warm the pitch lap's surface with hot water for a minute and press the pitch lap into shape by squirting a couple of shots of cerium oxide mixture and a couple of sprays of soapy water (do not use too much soap as it can remove important compounds from the pitch). It should look like this
Polish for 15 minutes to gain an initial shine.
Press hard and slowly stroke the mirror back and forth with 1/6 overhang on the far edge and the overhang on the near edge: the stroke overall should be about 1/3 the diameter of the mirror. Do not swing the mirror much side by side, sometimes called a 'W' stroke; instead keep the stroke more like '|'. Each stroke should take about a second. You should feel an even heavy drag. If the mirror skips or sticks then the lap needs to be pressed better into shape.
Make a half dozen strokes, then rotate the upper piece clockwise a bit and step around the bottom piece counter-clockwise a bit. Repeat. Add a bit of spray water if the lap begins to dry. The bubbles in the slightly soapy water (don't over-soap at this point) should keep the lap moist for 10-20 minutes.
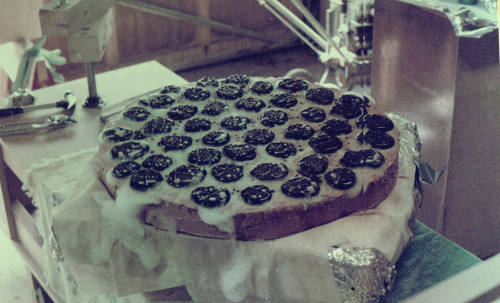
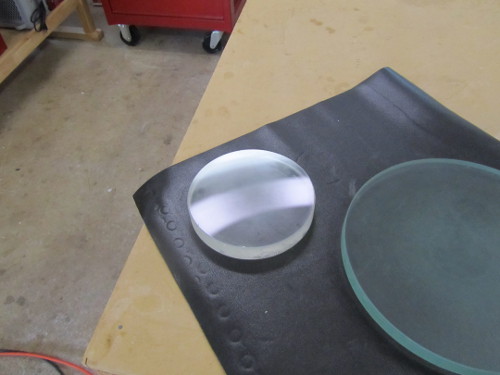
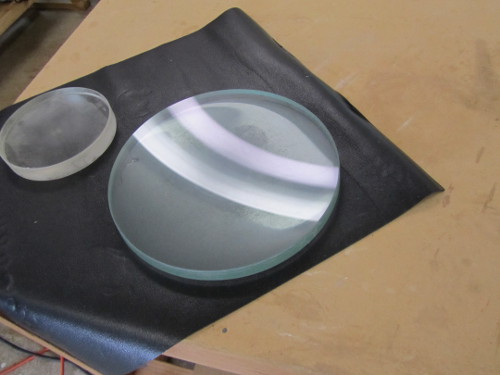
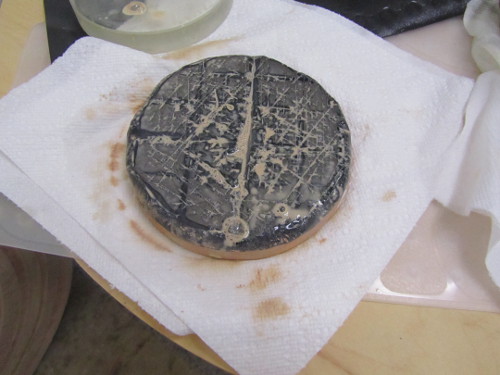
Here are the 6 inch [15cm] and 10.5 inch [27cm] mirrors flash polished. Note that the center of the mirrors are not as shiny as the edge. The test here is that there are no areas or zones of the mirror that do not have some polish. If this should ever be the case, polish for another 15 minutes and try again. If still zones show no polish, then consult an expert. It could be that fine grinding did not finish properly or that there is a problem with your polishing technique.
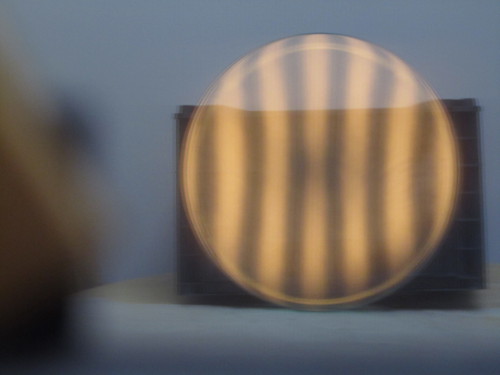
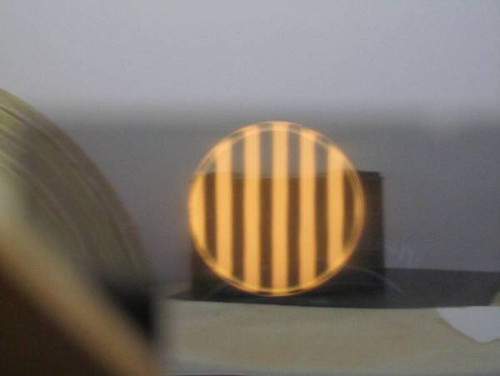
Do an initial Ronchigram test to verify that the bands are fairly straight without extreme curving at the edge. Note that you can see the centers' relatively less polish. These curves are called oblate spheroids where the center and edge are low and the 80-90% zone is high. This is a common outcome of fine grinding and can be straightened up an half an hour to hour of shorter (1/4 long) strokes without any side swing. See the third image (note the turned edge that is 1/16 inch [1mm] wide. Straight Ronchi bands indicate a spherical surface.

How Much Pressure?
A good rule of thumb is 1 PSI, or about 20 pounds pressure for a 6 inch (taking into account weight of blank and area lost to channeling and faceting).
Standard Work
Place the tool on a soft surface. I use non-stick mats meant for the kitchen.
Stroke the mirror on top back and forth with strokes that overall are one-third the diameter of the mirror. Vary them very slightly side to side. Make the strokes very regular - try not to vary them. Take six strokes (as pictured) then rotate the mirror on top clockwise 30-45 degrees or a twelfth to eight of a turn. At the same time take a step to your right or counterclockwise.
Mirror makers have a difficult time with stroke length. Mark the desired start and end points on the back of the mirror. Place masking tape on the work area to mark the length of the strokes. Most people over stroke.This can lead to edge problems.
Try to stop facing your work area in the same orientation that you started. If you cannot walk all the way around, then simulate these motions as best as you can.
Stroke the mirror on top back and forth with a heavy smooth motion that gives you lots of drag. Each stroke should take a second or two, so not so fast. Make all your work as regular as possible.
Don’t fall for nonsense about random motion. First of all, you cannot produce random motion. You might be able to move erratically or irregularly, but that’s not random. Random motion or too much erratic motion can cause astigmatism in larger thinner mirrors. Lastly, professionals and some amateurs use machines. The machine motion is very regular. Machine results are consistent and very good.
Use a cerium oxide to water ratio of 1:10. Add a droplet of dishwashing soap to help combat evaporation. Do not use too much as the soap can remove important compounds from the pitch. After about ten minutes the mixture will be thin. Stop momentarily to squirt a couple more modest squeezes of the cerium oxide and water polishing compound onto the tool. Be sure to shake the squeeze bottle every time, thoroughly mixing the cerium oxide, which can settle fairly quickly to the bottom of the bottle. I keep my bottle lying on its side – this orientation makes for easier and quicker mixing.
After 30 minutes the microfacetting may be pressed out and need to be renewed. Use an X-Acto knife under cold running water and renew the microfacets by scratching the knife across the lap holding the knife at an angle. Make cuts at several orientations. Wash off thoroughly and continue with polishing. Warning: this can make quite the mess. I do it outside in a clean area away from dust and breeze and let the pitch fragments melt naturally into the ground. Try to do an hour each session. You'll become tired.
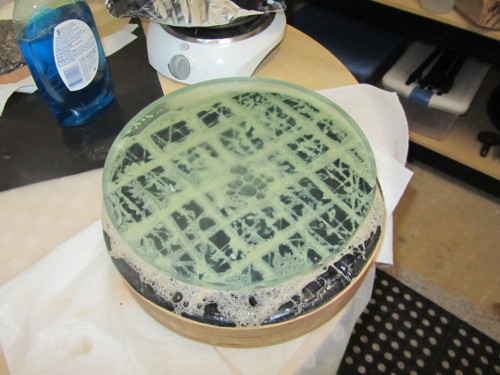
Here's what the standard stroke looks like with the blue mirror over the tan-gray lap.

Here's hand placement for small and medium sized mirrors. Try to keep your fingers from curling over the edges. This does not promote even heavy pressure across the entire stroke and can heat the edge of the mirror while polishing, resulting in a turned edge. Squirt a drop of water on your hands so that they will stick to the back of the mirror.
Here's what the lap looks like after squirting some cerium oxide polishing compound mixture onto the lap.Note the hint of soap water spray.
Most Common Polishing Mistakes
- Not understanding that polishing is all about removing pits left from fine grinding
- Not judging that precise moment when the temperature of the pitch is best for channeling and pressing
- Not enough pressure
- Stroking too fast
- Adding polishing compound at precisely the wrong time
- Not maintaining a consistent but slightly varying pattern of rotation of both tool and mirror
- Glancing at the figure before polishing is done - forgetting that the goal is solely to remove fine grinding pits
Determining when is Polishing Done
For an hour or two you'll see haze if carefully held up to a bright light at an angle. Eventually the haze disappears. But the glass is not fully polished. Use a powerful focused flashlight at a low incident angle with a magnifying lens to look for tiny pits and specs near the edge.
How Much Glass is Removed?
Each stroke removes several SiO2 molecules from the mirror's surface (about one nanometer or 10 angstroms). One solid trip around the barrel can affect a zone by 1/10 wavefront (50 nanometers or 500 angstroms).
Polishing Problems
- Mirror polishes strongly from center outward. If mirror on top then strokes are too long. Also possible is that fine grinding strokes were too long.
- Edge refuses to polish out. Fine grinding incomplete or poorly sized, poor quality final grits.
- Polishing taking too long. Not enough pressure. Strokes too fast. Incomplete fine grinding.
- Scratches. Poor quality polishing compound. Dusty work area. Scratches from fine grinding. No bevel.
Turned Down Edge
The extreme edge of the mirror can sharply turn or fall away. A turned edge is 1/32 to 1/8 inch wide [1-3mm]. Wider edge problems are called 'rolled edge' because the mirror's edge rolls away gradually over a wider width.
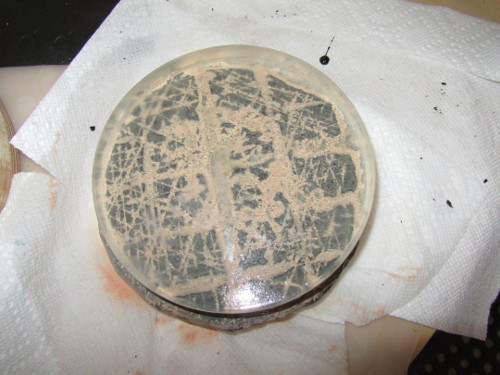
Here is a plate glass 10.5 inch [27cm] mirror with a 1/16 inch [1mm] wide turned edge that after an hour of effort is not going away.
TDE can be caused by incomplete fine grinding. Fine grinding often completes from center to edge. If not enough time is allowed per grit size then larger pits may remain at the very edge. TDE is most often caused by polishing with pitch laps that are somewhat undersized. The extreme edge of the mirror simply does not get the same polishing time as the rest of the mirror. Since amateur polishing typically drives the mirror to a very slightly shorter radius of curvature or focal length, the extreme edge will lag behind, staying at the longer focal length and appear turned. Also keep in mind that plate glass is more suspectible to TDE.
Fix a turned edge by either:
Mirror on top and using short strokes of no more than one-fourth the diameter of the mirror executed directly over the center of the tool (in other words, with no side to side motion).
Or tool on top using short strokes with some side to side swing so that the edge of the pitch lap goes out over the edge of the mirror by an inch [3cm] or so.
Or try a rectangular pitch lap 1x2 inches [2.5x5cm] for smaller mirrors, 2x4 inches [5x10cm] for larger mirrors, with elliptical strokes parallel to the edge.
Both of these approaches gradually lengthen the mirror’s radius of curvature, bringing it closer to the extreme edge’s longer radius of curvature. Do this for 30 minutes and inspect the results. If getting better then continue as long as you have patience.If after a reasonable effort TDE remains then it is time to be rational and move on. The TDE can be masked off with a retaining ring in the mirror mounting or can be ground off by increasing the bevel. The retaining ring is a good idea anyhow because it restrains the mirror with minimum diffraction or degradation to the image, unlike mirror clips that generate diffraction. In fact, one of the great telescope making companies of all time, Cave-Astrola, used retaining rings. The amount of glass lost is 1-2%, an amount that is completely unnoticeable at the eyepiece. Professionals have quoted twice the price for mirrors good to the extreme edge. For twice the price or twice the effort, one can make a larger mirror. Consider a 20.5 inch [52cm] mirror masked to 20 inches [51cm]. For twice the effort you can make the 20.5 inch [52cm] mirror good to the edge or make a 24.5 inch [62cm] mirror masked to 24 inches [61cm].
There is also a misconception that TDE scatters veiling light across the field of view. All light obeys law of diffraction - light from edge doesn't get a vacation. The light from the edge is not any different than light from center, in fact, it's the wave front of the incoming light being reflected by the wave front of the mirror that forms an image described by the laws of diffraction. Light from the edge consequently doesn't 'smear' outside of the airy disk and diffraction rings - it contributes to it. It is magical thinking says that turned edge smears light - this is a straightforward claim to test - mask off edge and try again, sweeping Moon into field of view and looking for stray light - you'll find no discernible difference. Depending on the test, mirror makers may have different fear factors - in the Foucault test it is hard to determine depth of turned edge so people who rely on it are overly fearful of turned edge. In conclusion, a turned edge is no different than a zonal error or surface roughness or over/under parabolization - they are all to be avoided, but they all occur to some degree and unless extreme, are not fatalistic or normally detectable; my experience from testing hundreds of telescopes over decades is that every single mirror (except perhaps a handful) has discernible defects, the defects in the best mirrors have no detectable impact on the image, the defects in the average mirror has slight impact on the image, certainly outweighed by the myriad of issues that accompany telescope use.
Astigmatism
This can be a huge problem with larger thinner mirrors. If you follow standard technique and keep the fine grinding and polishing actions regular, place the lower piece on a flexible mat, rotate it regularly, then astigmatism should not be a problem.
The star test or an interferometry test is customarily used to reveal any astigmatism. I've used the Ronchi test to not only reveal gross astigmatism but to quickly find the orientation of the saddle shape. Placing the Ronchi grating outside of the radius of curvature, bands that strongly curve one way on top and curve the other way on the bottom indicate the low portions of the saddle; bands that do not curve irregularly indicate the high portion of the saddle.
If your mirror has it, then make a considered guess as to the cause before continuing, otherwise the astigmatism may return after it has been removed. Causes include failing to pad and rotate the mirror when face up, the mirror's back not being a regular surface (flat or sphere), and wedge (one side of the mirror being thicker than the other) and bad glass.
There are two fixes. The first is returning to 220 grit. Grind the back regular and remove wedge if needed. Then after grinding the mirror face with 220 grit, cleanup thoroughly and flash polish by polishing for 15 minutes. Don't go onto finer grits until the astigmatism is gone. The second is to identify the saddle orientation, and using a sub-diameter lap, locally polish the ends of the saddle. It's not necessary to polish the center of the saddle. If the astigmatism cannot be removed then test the glass for strain or consult an advanced mirror maker.
Ronchi Tester
The Ronchi tester is easy and inexpensive to make. It reveals turned edge and overall smoothness. In the hands of an experienced practitioner it can be used to parabolize mirrors very accurately. For example I have parabolized a 30 inch [76cm] F/4, a 20 inch [51cm] F/5 and a 13.2 inch [34cm] F/3.0 mirror using the Ronchi tester pictured and my open source software (now online - see below). You are welcome to star test any of my scopes at the next star party that I attend and judge the results for yourself.
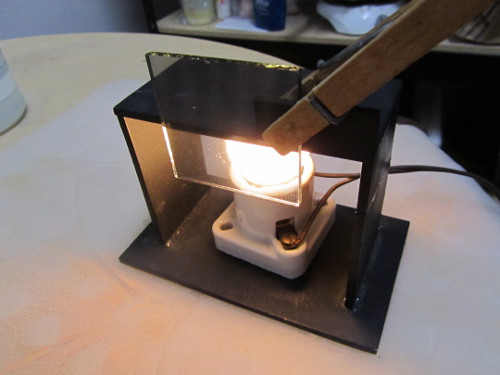
The tester consists of a light source that goes through one part of the Ronchi grating. You look through the other part of the grating. You can obtain gratings from a couple of sources.
I prop the mirror safely then place the Ronchi tester at the radius of curvature which is twice the focal length. I move the Ronchi tester up and down and left and right until I get the reflected image. I then move the Ronchi tester in and out until the reflected image is as large as possible. At this point I see bands so I adjust the Ronchi tester's position slightly. I use a music stand to hold the Ronchi tester.
Here is the Ronchi tester I built decades ago. It's been dropped and broken several times by me and students and glued back together each time. Pictured is a 2 inch square [5cm] 100 lines per inch [4 lines per mm] glass grating.
Here is the URL to my online Ronchi testing program. Ronchi
Later on in parabolizing we will consider other tests. It is a false dichotomy to claim that you should only use a single best test for polishing and parabolizing telescope mirrors. The reality is that you are better off using at least two tests (think of the Hubble optics calamity where they ignored the results of a second tester). For polishing and initial parabolizing, the Ronchi tester is the quickest test to run.
Prepping for Parabolizing
When is the polishing stage finished? When are we ready to begin parabolizing? This is an important stage that if skipped over can set up parabolization for failure.
The mirror must be fully polished. Any turned edge should be minimized. And the Ronchi bands should be as straight as possible (it is acceptable if the bands bow slightly outward towards the center if inside the radius of curvature) . To straighten the bands, adopt a stroke with no side swing (no ‘W’ action to the stroke). Straight bands mean a spherical mirror surface. Try this for 30 minutes then inspect the results. You may need to lengthen or shorten the stroke. Continue as needed.
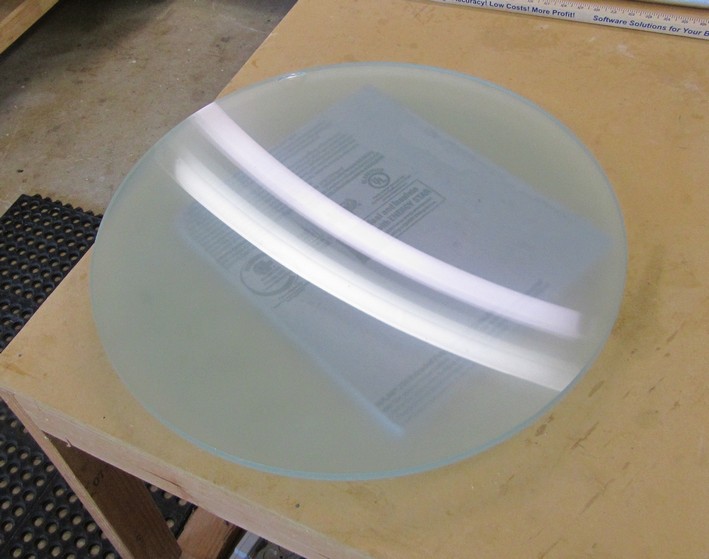
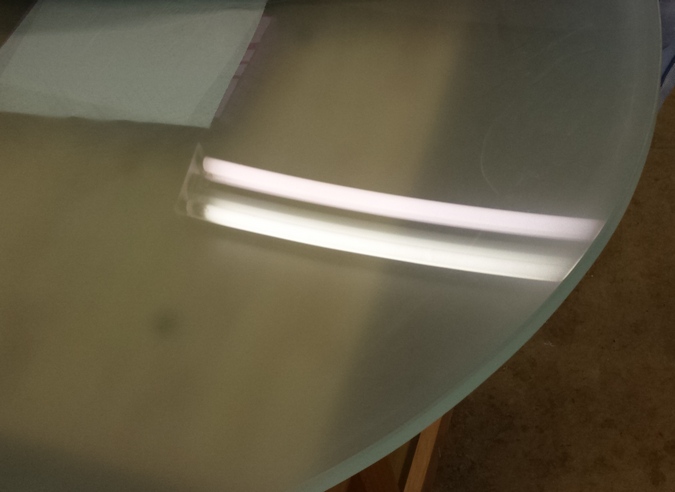
Here's the 10.5 inch [27cm] F/2.7 plate glass mirror pictured earlier ready for parabolizing: it is fully polished out, the edge is as good as it is going to be and the Ronchi bands are straight (the mirror is part of a perfect sphere).
(end of polishing)
For more see